Understanding the Real Impact of Sensory Spaces
Sensory rooms are much more than just play spaces – they serve as powerful tools that can truly change lives for children with autism. When designed thoughtfully, these spaces help create calm, improve focus, and support better behavioral control. Parents, teachers, and therapists have seen firsthand how these environments make a real difference in daily life.
How Sensory Rooms Transform Daily Life
For someone with autism, having a controlled space to explore different sensory experiences at their own pace is incredibly valuable. Being able to adjust and manage sensory input helps prevent overwhelm and build important coping skills. For instance, a child who struggles with loud environments can find peace in a quiet corner with gentle lighting and soft music, learning to self-soothe before reaching the point of meltdown. These positive sensory experiences help build a healthier relationship with various types of stimulation over time.
Adaptability and Therapeutic Effectiveness
The most successful autism sensory room ideas can flex and change since every person with autism processes sensory input in their own way. What soothes one person might be too much for another. This means being able to adjust things like lighting levels, sound options, and tactile elements to match each person’s needs. Taking this personalized approach helps the room stay useful for promoting self-regulation and reducing anxiety as needs change over time.
Key Sensory Elements and Their Impact
Different sensory features serve unique purposes in these spaces. Fiber optic lights and bubble walls help develop visual skills while creating an engaging atmosphere. Calming nature sounds or white noise machines reduce stress and enhance concentration. Textured surfaces and weighted blankets provide comforting deep pressure – for example, a weighted blanket can help decrease repetitive movements by meeting that sensory need. When combined thoughtfully, these elements create a complete sensory experience that adapts to individual preferences.
Getting Started Without Overwhelm
You don’t need to create an elaborate sensory room all at once. Start with just a few key elements, like a cozy beanbag chair and some calming music in a quiet corner. This lets you see how the person responds before slowly adding new features. The goal is making a space that helps them feel good and supported. Building gradually prevents overwhelm for everyone involved while ensuring the room truly meets their specific needs and preferences.
Designing Your Sensory Space for Maximum Impact
A well-designed sensory room does much more than just house equipment – it creates an environment perfectly matched to each person’s unique sensory needs. The key is thoughtfully arranging different elements to work together smoothly. For instance, you might pair a peaceful corner featuring soft lights and textured objects to help an overstimulated child calm down, while adding an active space with music and movement activities to build coordination. Success comes from making the space truly personal.
Creating Zones With Purpose
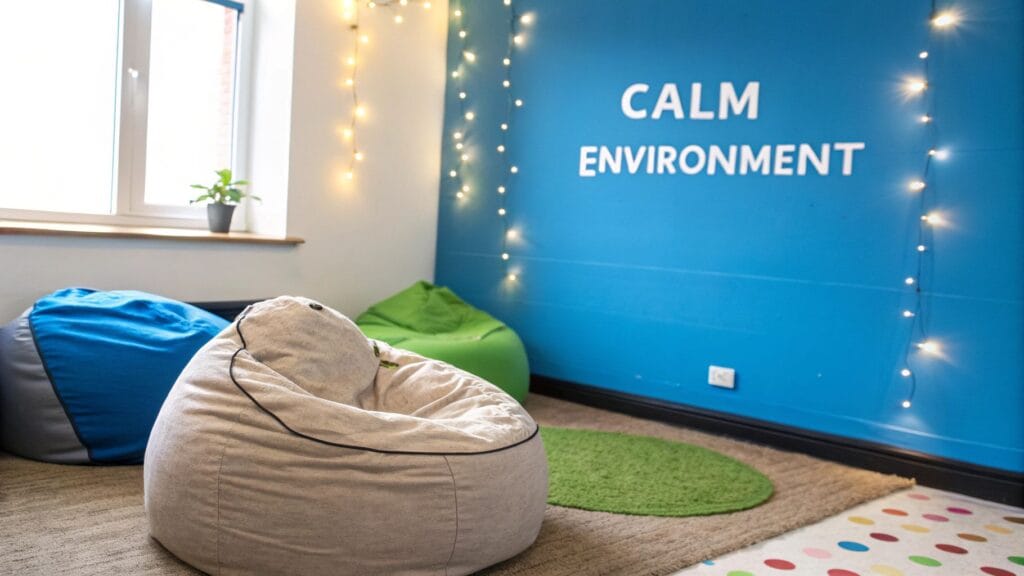
Just like you wouldn’t sleep in your kitchen, a sensory room works best when divided into distinct areas focused on specific needs. Breaking up the space into zones helps prevent sensory overload while making the environment easier to navigate and enjoy. Here are some essential zones to consider:
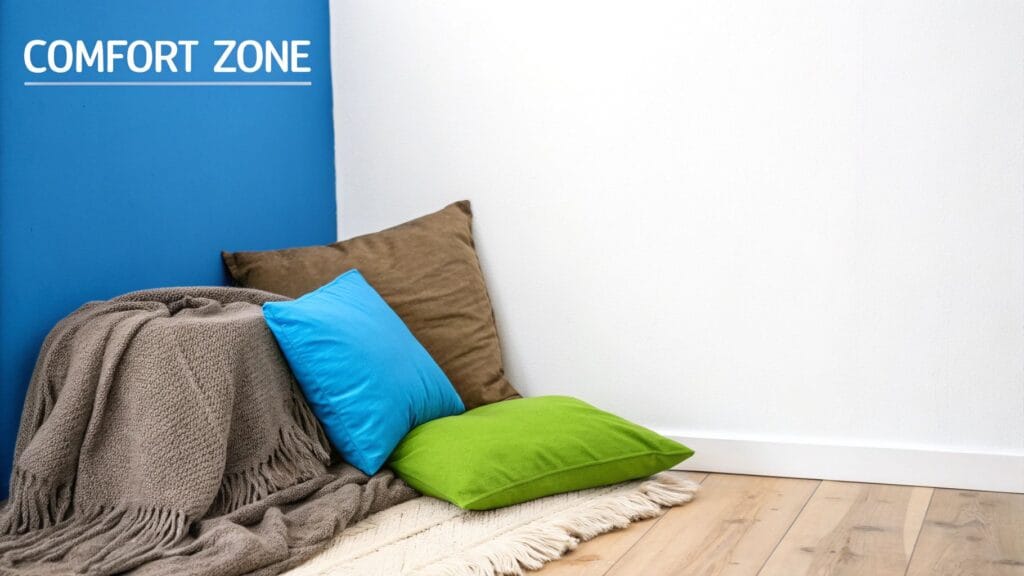
Calming Zone: Make this a peaceful retreat with gentle lighting, cozy seating like beanbags, soothing scents, and quiet activities such as puzzles or reading nooks.
Active Zone: Get bodies moving with equipment like mini-trampolines, balance beams, or swings. This space gives kids an outlet for extra energy and helps develop balance and coordination.
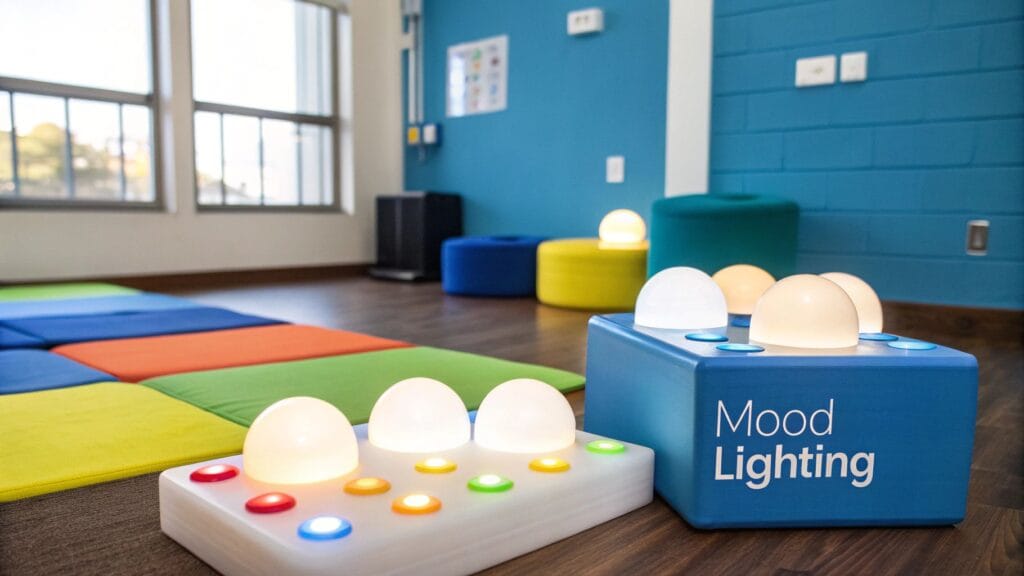
Visual Zone: Create visual interest using fiber optic lights, bubble walls, and projected images. Add interactive elements like light-up toys that kids can control themselves.
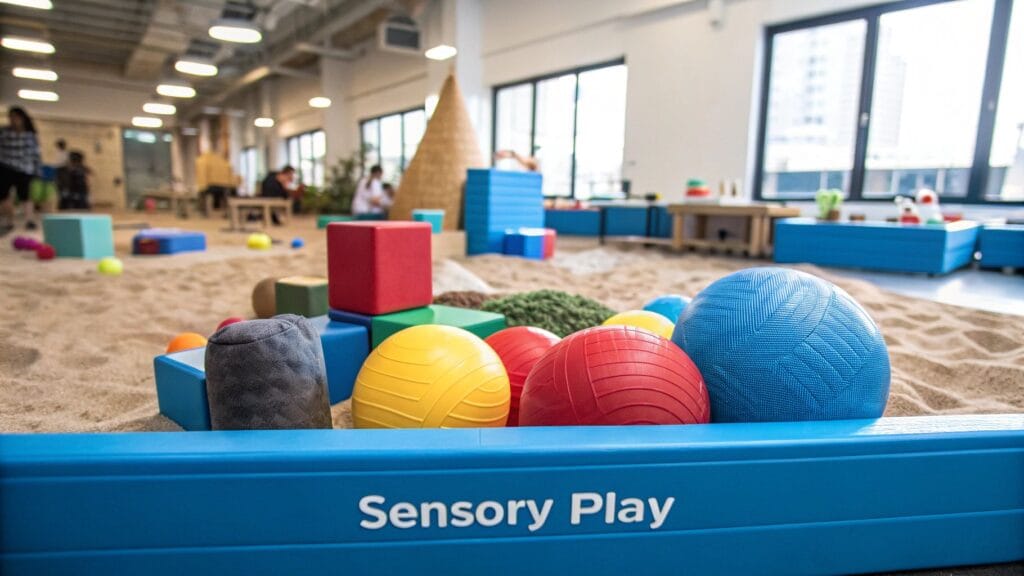
Tactile Zone: Fill this area with different textures to explore – think textured balls, play dough, sand, and water activities. This hands-on space is perfect for sensory exploration through touch.
Avoiding Common Design Mistakes
While there are many great sensory room ideas out there, it’s important to dodge some frequent pitfalls. Cramming too many items into the space can quickly become overwhelming – imagine trying to relax in a room bursting with flashing lights, loud sounds, and scattered toys. Start small with just a few key pieces and gradually add more as comfort builds.
Don’t overlook basics like lighting and acoustics. Harsh overhead lights can be jarring, while random loud noises may cause distress. Choose adjustable lighting options and use sound-dampening materials to keep the environment calm. Most importantly, really listen to individual preferences when designing the space. The room should reflect what works best for the child using it. For more information on supporting an autistic child during challenging moments, check out our article on How to Handle Autism Meltdowns.
When you keep these key points in mind while designing your sensory space, you create an environment that truly helps people thrive. A thoughtfully designed room becomes a valuable tool for parents, therapists, and teachers while giving individuals the support they need to develop coping skills and regulate sensory input effectively. The goal is simple but powerful – create a space where people can feel comfortable, capable and in control.
Smart Solutions for Every Budget
Building an effective sensory room for children with autism doesn’t have to cost a fortune. While high-end equipment can be great, many simple and creative solutions can provide just as much therapeutic benefit. This means that no matter your budget, you can create a supportive space that makes a real difference.
Prioritizing Essential Investments
Before jumping into DIY projects, it helps to identify which core elements deserve the most attention and resources. These key components form the foundation of an effective sensory room and often provide the biggest impact.
Quality Lighting: Good lighting control is key. Simple LED strip lights or a basic projector that displays calming colors and patterns can work wonders. Unlike harsh fluorescent lights that can overwhelm the senses, adjustable lighting lets you create the right atmosphere for different needs and moods.
Comfortable Seating: A cozy spot to sit or rest is essential. While premium sensory chairs are nice, you can create an equally welcoming retreat with soft floor mats or a collection of plush blankets and pillows.
Sound Management: Managing noise is crucial. Though full soundproofing might be out of reach, simple solutions like thick curtains, area rugs, and homemade sound panels covered in fabric can help create a peaceful environment.
Creative Alternatives to Premium Equipment
Many expensive sensory items have budget-friendly DIY versions that work just as well. This opens up possibilities for families to personalize spaces without spending too much.
DIY Bubble Wall: Rather than buying a pre-made unit, you can create a mesmerizing bubble display using a clear container, aquarium pump, water, dish soap and some simple LED lights.
Homemade Sensory Bottles: Fill clear plastic bottles with water, glitter, small toys or beads to make engaging visual and tactile tools. These can be customized endlessly based on individual preferences.
Textured Wall Panels: Instead of costly textured wall coverings, create your own sensory panels using different fabrics, felt, bubble wrap or sandpaper mounted on sturdy boards. This provides varied textures to explore.
Building Your Sensory Space Strategically Over Time
Remember that you don’t need to complete your sensory room all at once. Start with the basics and add elements gradually as your budget allows. This step-by-step approach makes the project more manageable and lets you adjust based on what works best.
For example, begin with a simple calming corner that has soft lighting and comfortable seating. Later, add a small tactile area with sensory bottles and textured items. Watch how these elements are used and let that guide your future additions, ensuring every new item serves a real purpose.
This measured approach helps create a truly useful space that grows along with changing needs while promoting calm and comfort. By combining smart investments with creative DIY solutions, you can build an effective sensory room that works for your family’s unique situation and budget.
Creating Purposeful Activity Zones
When designing a sensory room, simply filling it with equipment isn’t enough. Just like how every room in your house serves a specific purpose – you wouldn’t put your bed in the kitchen after all – a sensory room needs distinct zones for different activities. By thoughtfully organizing the space into dedicated areas, you can create an environment that better supports individual sensory needs and development.
Defining Key Zones Within the Sensory Room
Breaking the room into specific zones helps prevent sensory overwhelm by making experiences more predictable and manageable. For example, having a designated quiet area gives someone a place to retreat when they need calming input, while an active zone provides space for movement and energy release. Let’s look at the essential zones to include:
Quiet Zone: Think of this as a calming sanctuary. Soft lighting, cozy beanbag chairs, weighted blankets, and gentle sounds create a peaceful retreat. It’s perfect for reading, working on puzzles, or simply taking a break. This zone is especially valuable for anyone who gets easily overwhelmed by too much stimulation.
Active Zone: This is where movement happens! Equipment like mini-trampolines, swings, balance beams, and crawl tunnels let kids develop coordination and body awareness while burning energy. The active zone gives them a safe space to move freely and work on gross motor skills.
Visual Zone: Here’s where engaging visual experiences come to life. Items like fiber optic lights, bubble tubes, pattern projectors, and light-up toys capture attention and imagination. This area helps develop visual skills like tracking and color recognition. The key is making sure you can adjust the level of visual input based on individual needs.
Tactile Zone: This hands-on area is filled with different textures to explore. Textured wall panels, bins of sensory materials like beans or rice, play dough, and fidget toys provide opportunities for touch-based learning. These tactile experiences can be both calming and great for fine motor development.
Seamless Transitions and Balanced Stimulation
Making transitions smooth between zones is important. Simple visual markers like different colored floor mats or lighting help show where one area ends and another begins. It’s also crucial to balance energizing and calming elements throughout the room. While the active and visual zones might get kids excited, the quiet and tactile areas give them ways to regulate and ground themselves.
Remember that each child responds differently to sensory input – what calms one child might overwhelm another. Take time to observe how individuals interact with different elements and adjust the zones based on their needs. This personal approach ensures the sensory room remains helpful for supporting self-regulation, development, and overall wellbeing.
Implementing Effective Sensory Activities
Setting up a sensory room is just the beginning – the real impact comes from how you use it. While free play has its place, thoughtfully designed activities help children get the most therapeutic benefit from the space. Let’s explore practical ways to implement sensory activities that make a meaningful difference.
Structuring Sensory Sessions for Optimal Engagement
Like a well-planned lesson, sensory activities need structure – but not rigid rules. The key is creating a gentle flow that helps children know what to expect, which reduces anxiety and supports learning. For instance, you might start with calming activities in a quiet zone, move to more active play, then wind down with hands-on exploration.
Starting with deep pressure activities, such as using weighted blankets or squeezing playdough, can help calm the nervous system. This gets children ready to focus and engage with later activities. When you plan the sequence thoughtfully, each activity builds on the one before it.
Building Specific Skills Through Targeted Activities
The versatility of sensory rooms means you can work on many different skills. Fine motor activities like threading beads or searching through textured materials help develop hand coordination. Active zone activities such as obstacle courses build gross motor skills and balance.
The benefits go beyond physical development. Interactive games with lights and sounds can boost problem-solving abilities and teach cause-and-effect relationships. The key is matching activities to each child’s needs and goals so they stay engaged while making progress.
Fostering Social Interaction in Sensory Environments
While many think of sensory rooms as spaces for solo exploration, they’re also great for building social skills. Simple adjustments can turn activities into opportunities for working together and communicating.
For example, children might create art together using different textures or take turns activating sensory equipment. These shared experiences help them learn to interact positively with peers in a supportive setting. Activities can be modified to include children of different ages and abilities, making the sensory room truly inclusive.
Balancing Structure and Free Exploration
While planned activities are important, children also need time to explore freely. Unstructured play lets them follow their interests and discover the sensory environment at their own pace. Think of it like offering both set meals and a chance to sample different “sensory flavors.”
After completing a structured activity at the light table, for example, let children choose how they want to explore other items in the visual zone. This flexibility keeps the sensory room both educational and enjoyable, adapting to each child’s changing needs and interests.
Measuring Success and Making Smart Adjustments
Creating an autism sensory room is an ongoing journey of growth and adaptation. Rather than being a “set it and forget it” project, the space needs continuous evaluation to stay aligned with changing needs. Regular assessment and thoughtful modifications ensure the room remains an effective tool for self-regulation, growth, and overall wellbeing.
Recognizing Meaningful Progress: Beyond the Data
While numbers and metrics have their place, often the most telling signs of success come from careful observation of daily changes. For example, when a child who used to have frequent meltdowns starts independently seeking out the sensory room to self-regulate during stressful moments – that’s a powerful indicator of progress. Similarly, seeing a child who struggles with attention engage in longer periods of focused play within the room provides valuable insights about the space’s positive impact.
These real-world observations often tell us more than any spreadsheet could. It’s important to keep a detailed record of your child’s behavior, and the Guiding Growth app is an excellent tool for tracking daily activities. Our app helps you stay organized, monitor progress, and ensure consistent support for your child’s development.
Gathering Feedback and Adapting the Space
Getting input from users is key to making helpful adjustments. For verbal individuals, have open conversations about what elements they find calming or overwhelming. For those with limited verbal communication, pay close attention to their body language and reactions to different sensory experiences. If you notice someone consistently avoiding certain textures or sounds, consider modifying or removing those elements. This back-and-forth process of observing responses and making changes helps create a space that truly works for each person.
Practical Assessment Tools and Strategies
Simple tracking methods can help monitor progress in a structured way. A basic checklist noting changes in anxiety levels, sleep patterns, and other behaviors provides helpful documentation. For non-verbal children, visual scales using pictures to show different emotional states can be especially useful. These concrete tools make it easier to spot improvements and guide decisions about adjusting the environment. Learn more about these and other support strategies in our article: How Can I Help My Autistic Child.
Maintaining the Sensory Room for Long-Term Effectiveness
Like any therapeutic space, regular upkeep is essential. Create a simple maintenance schedule to clean equipment, check safety features, and replace worn items. For instance, make sure to routinely inspect swings and hanging elements for stability, and keep tactile materials clean and hygienic. This proactive care prevents problems and keeps the space inviting. As individual needs change over time, be ready to update the room accordingly – whether that means adding new elements, rearranging zones, or completely refreshing the space.
Finding your way as an autism parent? Guiding Growth is a mobile app created to support your journey. We help you track behaviors, monitor routines, and identify patterns using AI-powered insights. Our goal is to give you practical tools to better understand and support your child.