Visual supports are a game-changer for homeschooling children with autism. They use tools like pictures, symbols, and schedules to help kids process information, reduce anxiety, and build independence. Unlike spoken instructions, these supports stay visible, giving kids time to understand and follow routines without feeling rushed.
Here’s what you’ll learn in this guide:
- Why visual supports work: They simplify communication, improve focus, and help with transitions.
- How to set up your space: Use labeled zones, durable materials, and tools like timers or task boards.
- Practical tools: Visual schedules, First-Then boards, task checklists, and social stories and activities.
- Subject-specific tips: Use visual aids for math, reading, science, and history to make learning easier.
- Tracking progress: Monitor improvements with behavior charts or apps like Guiding Growth.
- Troubleshooting: Adjust supports to fit your child’s needs and learning style.
Visual supports help create structure and clarity in homeschooling, making daily routines more manageable for both you and your child.
Visual Supports for Students with Autism (Part 1)
sbb-itb-d549f5b
How Visual Supports Help Children with Autism
One of the key challenges for children with autism is processing spoken words, which disappear the moment they’re said. This can make it tough for those who need extra time to understand or respond. Visual supports, on the other hand, offer a lasting reference point. They stay visible, allowing children to revisit them as often as they need [5][11].
This permanence can significantly ease anxiety. A pilot study conducted in Edinburgh, Scotland, in March 2023, involving 29 families, highlighted this impact. Families using home-based visual tools like "Now/Next" boards and visual schedules reported a noticeable improvement in their quality of life (p = 0.005) and a reduction in autism-specific challenges (p = 0.006). Notably, every family in the study successfully integrated visual supports into their daily routines [13].
"When we talk, the words we say disappear instantly! Visual supports last for a much longer time. When we use visual support at the same time as talking, we give children extra time to understand, prepare for change, and think about how to respond." – Speech and Language UK [12]
Visual supports aren’t just about reducing anxiety – they also promote independence. Instead of relying on constant verbal reminders, children can use tools like labeled bins to find materials, visual schedules to understand what’s coming next, or choice boards to express their preferences. This not only minimizes frustration but also boosts confidence and self-esteem [14].
These tools are equally powerful in enhancing communication. For instance, choice boards help avoid the "recency effect", where a child might only remember the last option they heard [5]. For children with limited verbal skills, visual aids like emotion thermometers provide a way to express feelings and internal states. These tools make it easier for them to share their needs and preferences, laying the groundwork for many of the strategies discussed later, from creating structured learning environments to integrating visual tools into various activities [10].
Setting Up Your Homeschool with Visual Supports
Creating a Dedicated Learning Space
Designing a well-organized learning space can make a big difference in how your child engages with homeschooling. Use physical boundaries like colored tape, rugs, or furniture to define specific zones such as a "Reading Corner" or a "Math Area." These clear divisions help your child understand the purpose of each space and what activities happen there [6].
Label shelves, containers, and learning zones with both words and pictures at your child’s eye level. This simple step encourages independence and helps them locate items quickly. Instead of using generic clipart, try using real photographs of your child’s belongings. Pair these images with a solid background, like plain construction paper or a blank wall, to minimize distractions [1].
"Individuals on the autism spectrum demonstrate strength in visual learning, but oftentimes struggle with auditory learning." – The Autism Helper [2]
For durability, print visual supports on sturdy cardstock and laminate them. Smooth any rough edges to avoid scratches. If you’re creating portable supports, attach them to metal rings or keychains for easy access.
Once your learning space is set up, stock it with tools and materials that will support your child’s day-to-day routines.
Materials and Tools You’ll Need
Start small with basic tools like index cards, sticky notes, and a whiteboard. A reusable writing tablet, such as a Boogie Board, can serve as a quick and effective way to create visual reminders [15].
For more structured visual aids, gather supplies like cardstock, a laminator (or clear contact paper), Velcro strips, magnets, and a pocket chart. A visual timer, such as a Time Timer that displays time as a shrinking colored disk, can be especially helpful for teaching time management.
Here’s a quick look at some tools and their purposes:
| Tool Category | Specific Examples | Purpose |
|---|---|---|
| Schedules & Boards | Visual Schedules, First-Then Boards, Choice Boards | Helps with predictability and transitions |
| Time Management | Time Timers, sand timers, digital countdown apps | Aids in understanding time durations |
| Communication | Sentence strips, PECS, conversation starters | Encourages requests and social interaction |
| Organization | Label makers, pocket charts, Velcro strips, metal rings | Keeps materials organized and accessible |
Incorporate these tools into interactive routines to help your child build independence. For example, create a "Finished" box or folder where they can place completed task cards. This gives them a clear sense of progress and accomplishment. If you’re using visual schedules, add Velcro strips so your child can physically remove tasks as they finish them, making the process more hands-on.
Digital tools can also be a great addition. Platforms like Canva or PowerPoint are excellent for designing social stories, and tools like ChatGPT can help you brainstorm scripts for teaching specific behaviors. Print these out and organize them in a binder for easy access. Begin with one or two supports that address your child’s most pressing challenges – such as mastering the morning routine – before gradually expanding to other parts of the day.
Types of Visual Supports and How to Use Them
Types of Visual Supports for Homeschooling Children with Autism
Once you’ve set up an organized learning space, visual supports can further simplify your homeschool routine. These tools serve various purposes, from structuring daily activities to teaching specific behaviors. By integrating these supports, you can make transitions smoother and encourage greater independence throughout the day.
Visual Schedules for Daily Routines
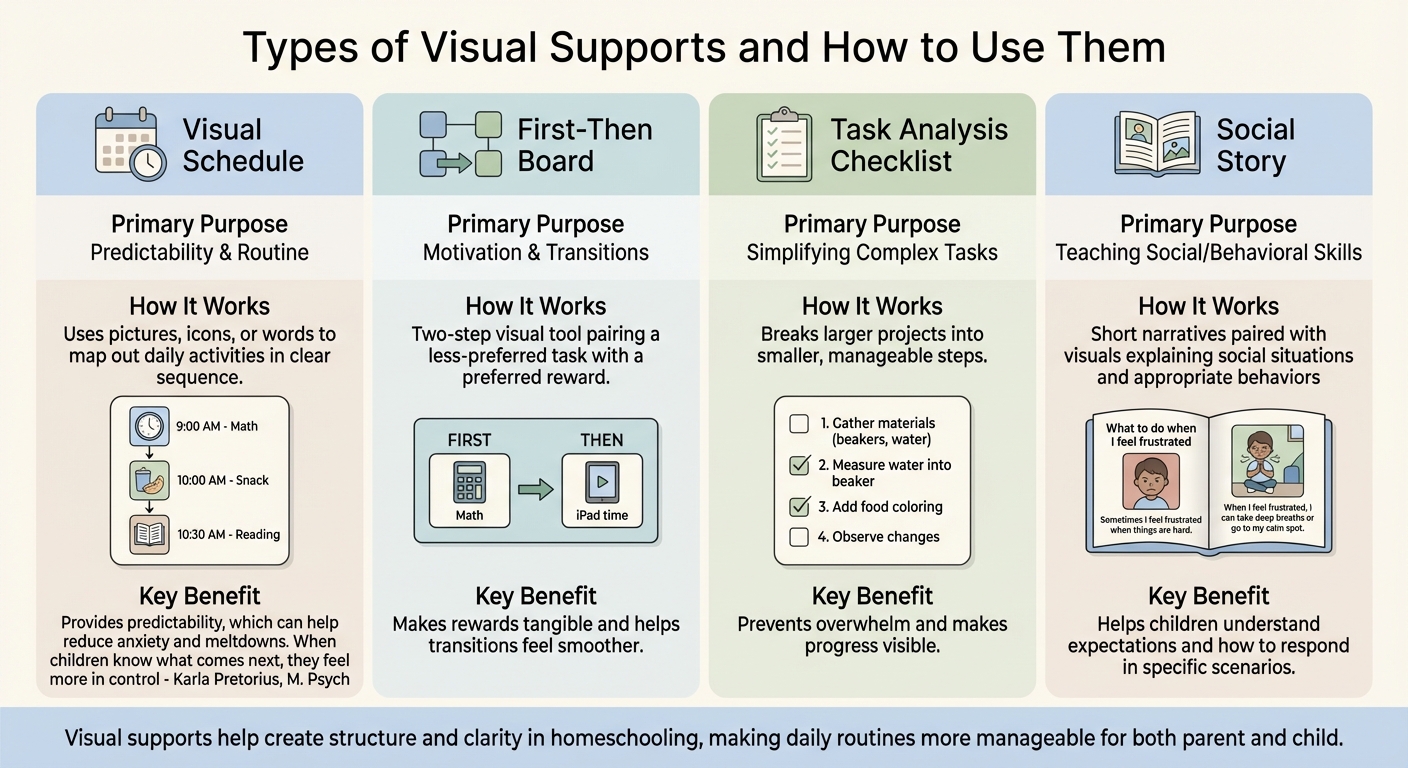
Visual schedules use pictures, icons, or words to map out the day’s activities in a clear sequence. They help children anticipate what’s coming next, which can ease anxiety during transitions. As Karla Pretorius, M. Psych, and Nanette Botha, BEd explain:
"Visual schedules provide predictability, which can help reduce anxiety and meltdowns. When children know what comes next, they feel more in control of their environment" [8].
You can create a schedule for the entire day or break it into smaller segments to fit your routine. Using familiar photos can make the schedule more relatable [8][1]. Arrange activities in a left-to-right or top-to-bottom format, aligning with how books are read.
For unexpected events, include a question mark icon to signal surprise activities. This addition helps children adapt to changes. To make the schedule interactive, use Velcro so tasks can be marked as completed – giving a clear sense of accomplishment.
First-Then Boards for Transitions
A First-Then board is a simple two-step visual tool that pairs a less-preferred task with a preferred reward. The "First" section shows the task to be completed – like finishing a math worksheet – while the "Then" section displays the reward, such as 10 minutes of iPad time [6][5]. This structure motivates children by making the reward tangible.
Place the board where it’s easily visible. When introducing a task, point to the "First" card and say, "First we do math", then point to the "Then" card and add, "Then you get iPad time." Use clear and consistent language, and immediately provide the reward once the task is done. This reinforces the connection between effort and reward, helping transitions feel smoother.
Task Analysis Checklists for Breaking Down Assignments
Task analysis checklists break larger projects into smaller, more manageable steps. For instance, a science experiment could be divided into steps like gathering materials, reading instructions, measuring ingredients, recording observations, and cleaning up [6][9]. This method prevents children from feeling overwhelmed by complex tasks.
Depending on your child’s reading level, you can use images or written instructions. For those who enjoy reading, incorporating words into each step can appeal to their strengths [15]. Be specific about what "finished" looks like for each step – for example, "clean up" might mean putting materials back in the bin and wiping the table [15]. These checklists help build confidence by making progress visible.
Social Stories for Teaching Behavior and Social Skills
Social stories are short narratives paired with visuals that explain social situations, appropriate behaviors, or coping strategies. These stories help children understand what to expect and how to respond in specific scenarios. For example, you could create a story about "What to do when I feel frustrated with a lesson" or "How to share materials with my sibling during art time" [6][7].
Use simple language and include real photos of your child’s environment, such as their learning area or family members, to make the story relatable. Explain the reasoning behind actions – for instance, say, "We wash our hands to keep germs away" instead of just "Wash your hands." Keep the design clean and avoid clutter to prevent overstimulation. Social stories lay a foundation for understanding expectations in various learning situations.
| Visual Support Type | Primary Purpose | Homeschool Application Example |
|---|---|---|
| Visual Schedule | Predictability & Routine | Mapping out subjects like "Math, Snack, Reading" [8] |
| First-Then Board | Motivation & Transitions | "First Math, Then iPad time" [6] |
| Task Analysis | Simplifying complex tasks | Step-by-step guide for a science experiment or handwashing [6] |
| Social Story | Teaching social/behavioral skills | A story about "What to do when I feel frustrated" [6] |
Using Visual Supports in Different Subjects
Visual supports can make core academic subjects more engaging and easier to grasp. By tailoring these tools to fit areas like math, reading, science, and social studies, abstract concepts become more relatable and manageable. Beyond routines, these subject-specific strategies allow you to customize learning experiences for your child.
Visual Tools for Math and Science
Math often relies on visual thinking. Studies show that when solving math problems, the brain activates visual processing pathways, even with symbolic numbers[19]. The Concrete-Pictorial-Abstract (CPA) approach is a well-established method for teaching math. It starts with physical objects, moves to pictures, and finally transitions to abstract symbols[17][18]. For instance, when learning addition, a child might count actual items like beans, then draw pictures to represent them, and eventually use numbers.
Number lines are another powerful tool. Research shows that after just four 15-minute sessions using a number line game, students from low-income backgrounds closed knowledge gaps with their peers from middle-income families[19]. You can create a simple number line on poster board and let your child move a marker along it while solving problems.
Strip diagrams are also effective for solving word problems. Imagine a problem like, "Sarah has 12 apples and gives 5 to her friend." Drawing two connected rectangles – one for the total (12) and another for the part given away (5) – visually clarifies that subtraction is required[18].
Jo Boaler, a professor at Stanford University, highlights the role of visual aids in math:
"Fingers are probably our most useful visual aid, critical to mathematical understanding, and brain development, that endures well into adulthood"[19].
Finger counting, often discouraged, actually strengthens brain areas linked to advanced calculations. Boaler and Cathy Williams demonstrated this in a Stanford math camp for 7th and 8th graders, where students explored visual algebra, patterns, and distance-time graphs using motion sensors. After 18 lessons, participants improved their district math test scores by an average of 50%[19].
These visual strategies in math and science open the door to applying similar tools for reading and writing.
Graphic Organizers for Reading and Writing
Graphic organizers help children map out ideas and see how they connect, which supports executive functioning[5][20]. For reading comprehension, a story map can be a game-changer. Create four labeled boxes – characters, setting, problem, solution – and have your child fill them in as they read. This simple structure aids memory and helps them follow the story’s flow.
Sentence strips are another handy tool, especially for kids developing language skills. For example, you could make a strip that says, "I see a ____" with a blank space for your child to add a word or picture. This approach builds confidence and encourages communication[16][20].
When it comes to writing, checklists can break down the process into smaller, manageable tasks. A checklist for paragraph writing might include steps like choosing a topic, drafting a topic sentence, adding three details, writing a closing sentence, and checking for spelling errors[6][20]. Completing each step gives a sense of accomplishment.
Heather Gilmore, a behavior analyst, explains:
"Visual supports can help the individual navigate tasks that require organization and other executive functioning skills"[20].
Environmental labels are another way to boost early literacy. Label objects in your space – like "desk", "bookshelf", or "pencil box" – with both the word and a simple picture. This pairing of text and visuals reinforces reading skills throughout the day[5].
Similar visual aids can simplify abstract concepts in history and geography.
Timelines and Charts for History and Geography
History and geography often involve abstract ideas, like the flow of time or spatial relationships. Visual tools make these concepts easier to understand. Timelines, for example, help reinforce chronological order. Create a timeline on a long strip of paper, marking key events with dates and simple illustrations. For an American history unit, you might include milestones like the signing of the Declaration of Independence (1776), the Civil War (1861–1865), and the moon landing (1969). Adding Velcro strips allows your child to move events around, making the activity more interactive[1].
Maps are another essential tool, offering clear spatial organization. For example, when studying a region, print or laminate a map for durability[1][8]. Use simple icons – like a photo of the Statue of Liberty for New York City – and avoid clutter that might distract from key details[1][7].
Charts and diagrams can also clarify complex systems. A flowchart showing how a bill becomes a law or how climate zones influence vegetation simplifies these processes. Using arrows to connect steps makes the information easier to follow than dense paragraphs[7].
For consistency, stick to the same fonts and label sizes across your visuals so they’re easy to recognize[1]. When choosing images for historical figures or landmarks, opt for perspectives similar to what your child might see in real life. This improves recognition[1]. Research shows that visual supports help children with autism complete tasks independently and adapt more easily to changes in their environment[2].
Tracking Progress and Adjusting Visual Supports
Keeping track of progress ensures that visual supports grow with your child’s changing needs, fitting seamlessly into your homeschooling approach. After introducing visual supports, pay attention to signs of improvement, such as fewer prompts, reduced whining or tantrums, and better focus during tasks [3][20].
It’s important to remember that progress can take time – sometimes days, sometimes months. EC Behavior Supports emphasizes this with an important reminder: "Without effective teaching and implementation, Visual Supports are just another piece of paper!" [3]. This highlights the importance of teaching your child how to use these tools through clear instructions, modeling, repetition, and positive reinforcement. These strategies lay the groundwork for effective tracking.
Using Behavior Charts and Reward Systems
Behavior charts and reward systems are great tools for monitoring daily progress and encouraging task completion. Options like token boards, sticker charts, and checklists can help make progress visible and motivating [20]. For instance, you might create a chart where your child earns a star for each completed task, with a set number of stars leading to a reward, such as extra playtime. Another idea is to use a "finished" marker system – like a pocket for completed task cards – to help your child feel a sense of accomplishment and ownership over their routine [8][4].
Karla Pretorius, M. Psych, shares valuable insight on this approach:
"Visual schedules empower children to take ownership of their daily routine, enabling them to complete tasks independently and build life skills. Positive reinforcement can motivate them to continue using the visual schedule. Remember to stick with sincere social praise" [8].
As your child grows, you can adjust the criteria for earning rewards to match their development [6]. While these analog tools are effective, digital solutions can also provide a helpful way to track progress over time.
Using Guiding Growth to Track Patterns
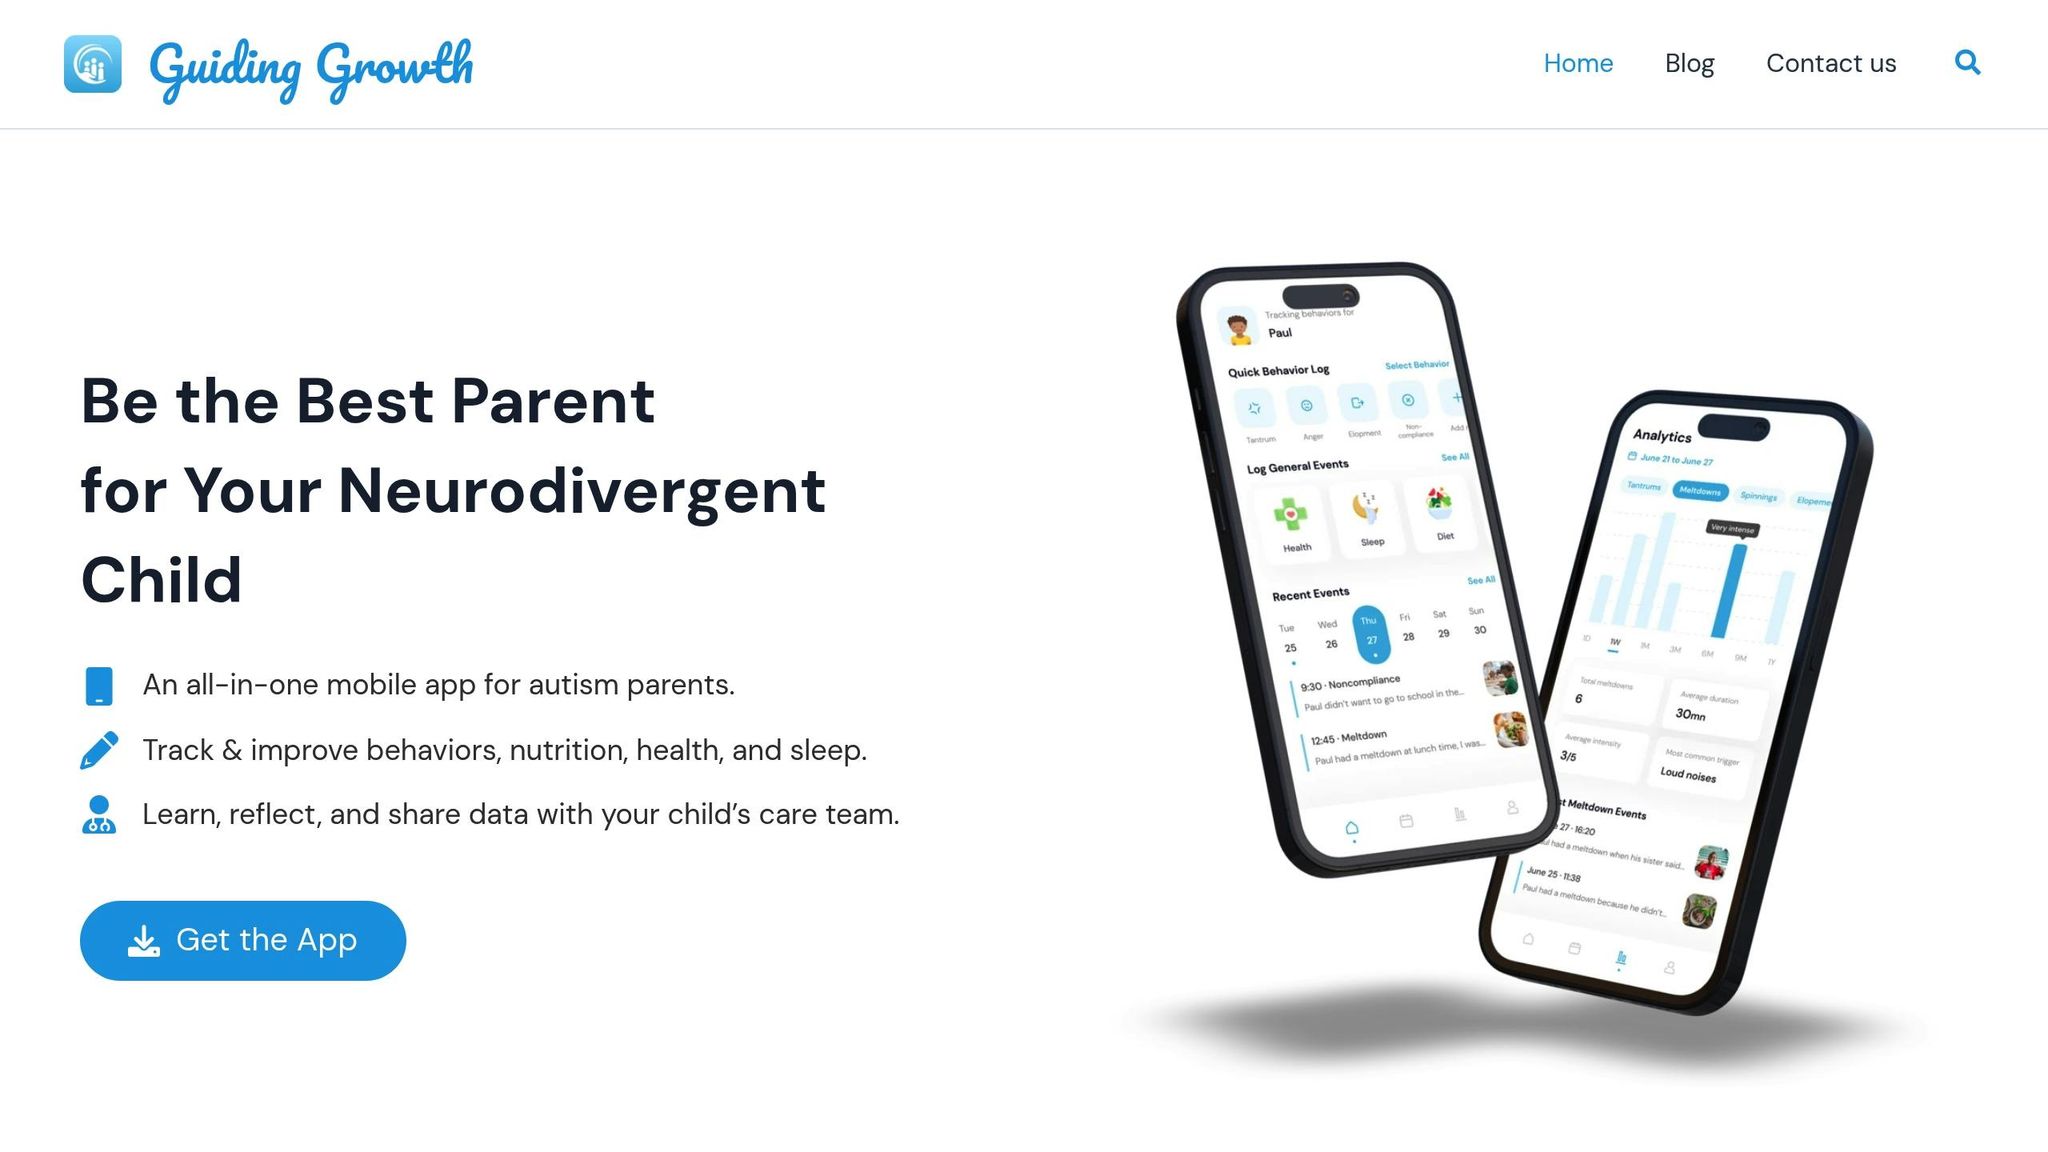
For a broader perspective, digital tools like the Guiding Growth app can complement daily tracking. This app allows you to log various aspects of your child’s routine – such as behaviors, sleep, nutrition, and activities – and turns that data into meaningful patterns. Instead of relying on memory or scattered notes, you can consistently record observations and identify trends.
For example, you might notice that visual schedules work best on days when your child gets enough sleep or that certain subjects require more frequent breaks. The app also generates detailed reports you can share with healthcare providers or therapists, making it easier to refine strategies together based on concrete data rather than guesswork.
Solving Common Problems with Visual Supports
Even the most effective visual supports can run into issues. Maybe your child ignores the schedule, or the system stops working as effectively as it once did. These hiccups are normal, and most can be resolved without scrapping everything and starting over.
When Your Child Resists Visual Schedules
If your child resists using a visual schedule, it’s a sign that the system might need some tweaking. As LessonPix points out, "We must teach children how to use a schedule and refer to the schedule often. Simply sticking them up on the wall is not enough" [5]. Actively guide your child through the schedule – this could mean pointing to the next step or moving finished tasks to a "done" pocket. These small actions help reinforce the routine.
Feeling overwhelmed by a full-day schedule? Try simplifying things with a First-Then board. This approach focuses on one required task followed by a preferred activity, making transitions smoother. For example, placing a less enjoyable activity right before a highly motivating one can help ease the resistance.
Another tip: reduce verbal instructions. Pair clear images with a few simple words to avoid overstimulation. You can also involve your child in creating the schedule – whether it’s choosing pictures or arranging the cards. This gives them a sense of control and makes the process more engaging.
From here, you can fine-tune the system to fit your child’s individual learning style.
Customizing for Different Learning Styles
To make visual supports more effective, they should align with your child’s developmental stage and learning preferences. For instance, younger children might only handle 2–3 choices at a time, while older kids can manage 6–12 options [5]. Start with what’s manageable for your child. For very young or pre-verbal children, real objects work best. As they grow, you can transition to photos, then simple drawings, and eventually written words.
Take sensory preferences into account when creating these supports. Photos taken from your child’s eye level, especially against a plain background, can make visuals more relatable. Using images of their favorite toys or daily items can also help. For kids starting to read, pairing text with images and keeping fonts and language consistent across caregivers can support literacy development.
Adding personal touches, like favorite characters or themes, can make the supports more engaging. Katherine G. Hobbs, AA, explains, "Visual aids expand a child with autism’s ability to interact with their surroundings. They can give children a sense of autonomy and allow them to make choices and express needs" [4]. To make the system last, print visuals on cardstock, laminate them, and use Velcro strips or metal rings for easy updates. This way, the supports can grow and adapt as your child’s needs evolve.
Creating a Structured Homeschool Environment
A well-organized homeschool setup brings a sense of predictability that can ease anxiety and help children grow more self-reliant. One effective way to achieve this is through visual supports, which act as a daily roadmap for your child. Karla Pretorius, M. Psych, emphasizes their importance:
"Visual schedules are powerful tools that can transform daily routines for neurodivergent children and their families by providing structure, promoting predictability, and encouraging independence." [8]
Striking the right balance between consistency and flexibility is key. For example, placing schedules and checklists at your child’s eye level can make routines feel more accessible. A hand-washing guide near the sink or clearly labeled spaces like "Art Station" or "Homework Desk" can help create a sense of order and clarity.
Over time, as your child grows more familiar with these visual tools, you can start cutting back on verbal prompts to further nurture their independence. Sue, Coach and Founder of How To Help My Child, explains:
"Visual cues clearly outline each step, reinforcing independence." [21]
As your child settles into this structured environment, it’s important to keep an eye on their progress and adjust your approach as needed. Tools like Guiding Growth can assist in this process by tracking behaviors, activities, and milestones. The app turns daily observations into actionable insights, helping you adapt visual supports to your child’s evolving needs while also simplifying communication with healthcare providers.
FAQs
What visual support should I start with first?
A helpful starting point is creating a visual schedule. Break the day into smaller, easy-to-follow sections, focusing on specific activities or routines. Incorporate visual aids like pictures, symbols, or written words to make the schedule clear and easy to understand. Begin with just a few tasks to avoid overwhelming your child, then gradually add more as they grow comfortable with the routine. This approach can ease anxiety and make transitions smoother.
How do I get my child to actually use a visual schedule?
To get your child excited about using a visual schedule, make it fun and tailored to their preferences. Incorporate pictures, symbols, or simple words for each activity, and use Velcro strips so they can physically remove tasks once completed – this gives a satisfying sense of achievement. Be sure to include breaks, transitions, and small rewards to keep them motivated. Let your child help design or pick out the visuals – this involvement can spark their interest. Sticking to the schedule consistently can help ease anxiety and encourage better participation in daily routines.
How can I track whether visual supports are working over time?
To see how well visual supports are working, pay attention to your child’s behavior and reactions during different activities. Watch for changes such as greater independence, less anxiety, or quicker completion of tasks. Keeping a journal or log can be helpful – record patterns in behavior, how transitions go, and how tasks are completed over time. Regular tracking like this can show whether visual supports are making a difference in your child’s daily routines and overall development.