You say, “Five more minutes,” but your child hears a warning with no visible endpoint. The tablet stays in their hands, the preferred activity continues, and then the transition suddenly becomes a crisis when you ask them to stop. You may be repeating yourself, negotiating, or trying to move through the next routine while everyone's stress rises.
An autism timer visual can change that interaction. It isn't a punishment and it shouldn't be used to force compliance. It's a bridge between an activity that feels safe and the next activity that still feels uncertain, especially when the child can't yet turn spoken time into a reliable internal expectation.
Table of Contents
- Why Transitions Feel So Hard
- How an Autism Timer Visual Works
- Choosing the Right Type of Visual Timer
- Building Predictable Routines Together
- Practical Tips for Successful Implementation
- Digital Solutions and App Integration
- Moving Toward Calmer Days
Why Transitions Feel So Hard
A transition asks a child to do several difficult things at once. They must stop something rewarding, understand what comes next, tolerate the loss of control, and shift their attention before they're emotionally ready. For an autistic or otherwise neurodivergent child, an unexpected change can feel less like a small interruption and more like the removal of a predictable anchor.
The phrase “five more minutes” doesn't solve the problem if five minutes has no concrete meaning. A child may not know whether the adult will return in five minutes, whether the activity will really end, or what “almost finished” looks like. Practical guidance from the University of Colorado Denver on using visual timers describes their value in helping children understand remaining time, prepare for change, and feel more in control.
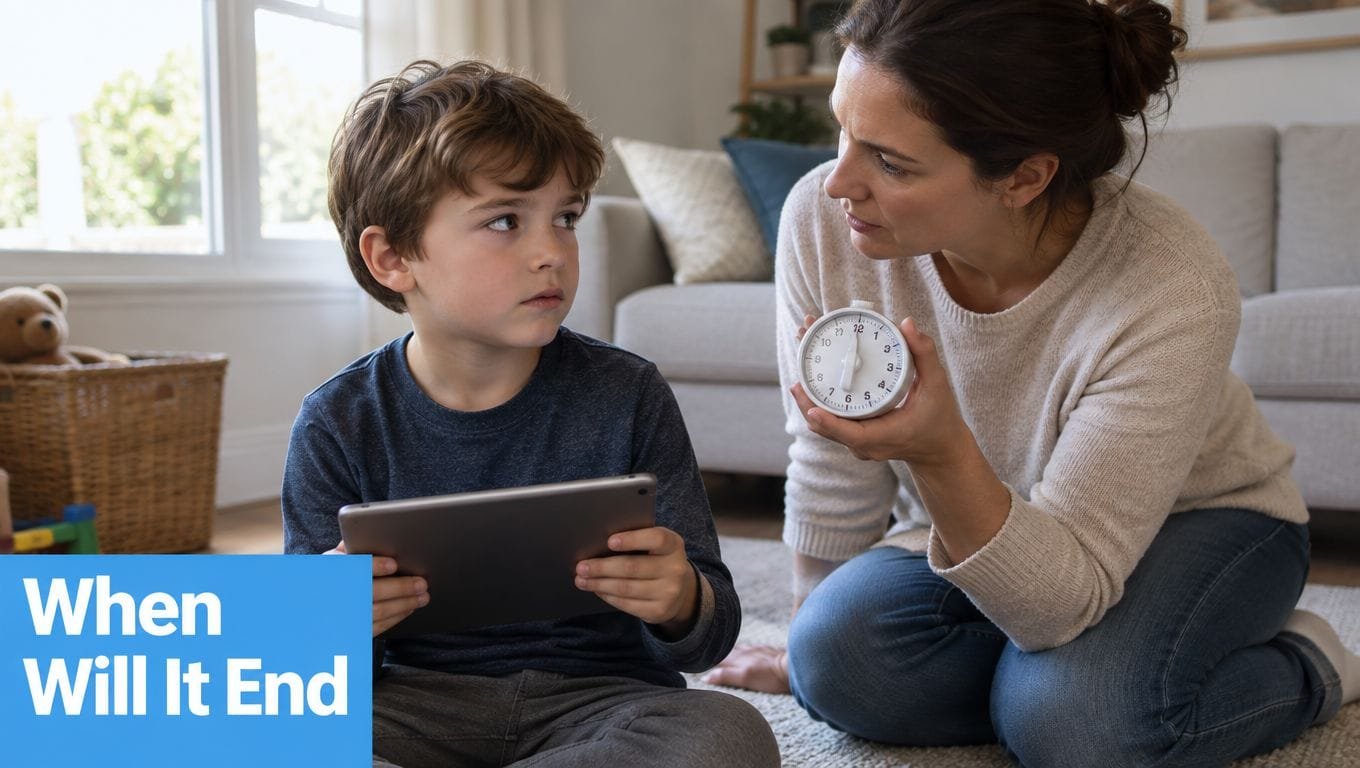
The timer is a bridge, not a threat
Consider a child playing a favorite game. A parent announces that tablet time is ending, but the child has no way to see the remaining duration. The announcement feels arbitrary, so the child protests when the parent returns. A visual timer gives both people the same reference point. The adult isn't repeatedly taking time away, and the child can watch the endpoint approach.
This doesn't mean every transition becomes easy immediately. A timer won't remove sensory overload, fatigue, hunger, communication difficulty, or the disappointment of stopping a preferred activity. It can, however, remove one source of uncertainty. Understanding the child's sensory triggers and patterns can help you decide whether the main barrier is the ending itself, the sound of the timer, the next environment, or the demand that follows.
Practical rule: Show the ending before the transition becomes urgent. A timer works better as preparation than as a last-second warning.
How an Autism Timer Visual Works
A visual timer turns duration into something the child can observe. Depending on the tool, a colored section may shrink, a disk may disappear, a container may fill, or numbers may count down. The display keeps changing while the child plays, eats, gets dressed, or waits, so time isn't represented only by an adult's voice.
That continuous signal matters. A spoken cue happens once and then disappears. A shrinking disk or bar remains available for checking, which lets the child look again without asking, “How much longer?” Guidance from the Delaware Autism Network on visual timers describes visual timers as a way to represent time with colors, symbols, pictures, or numbers and to show when it's time to move to another activity.
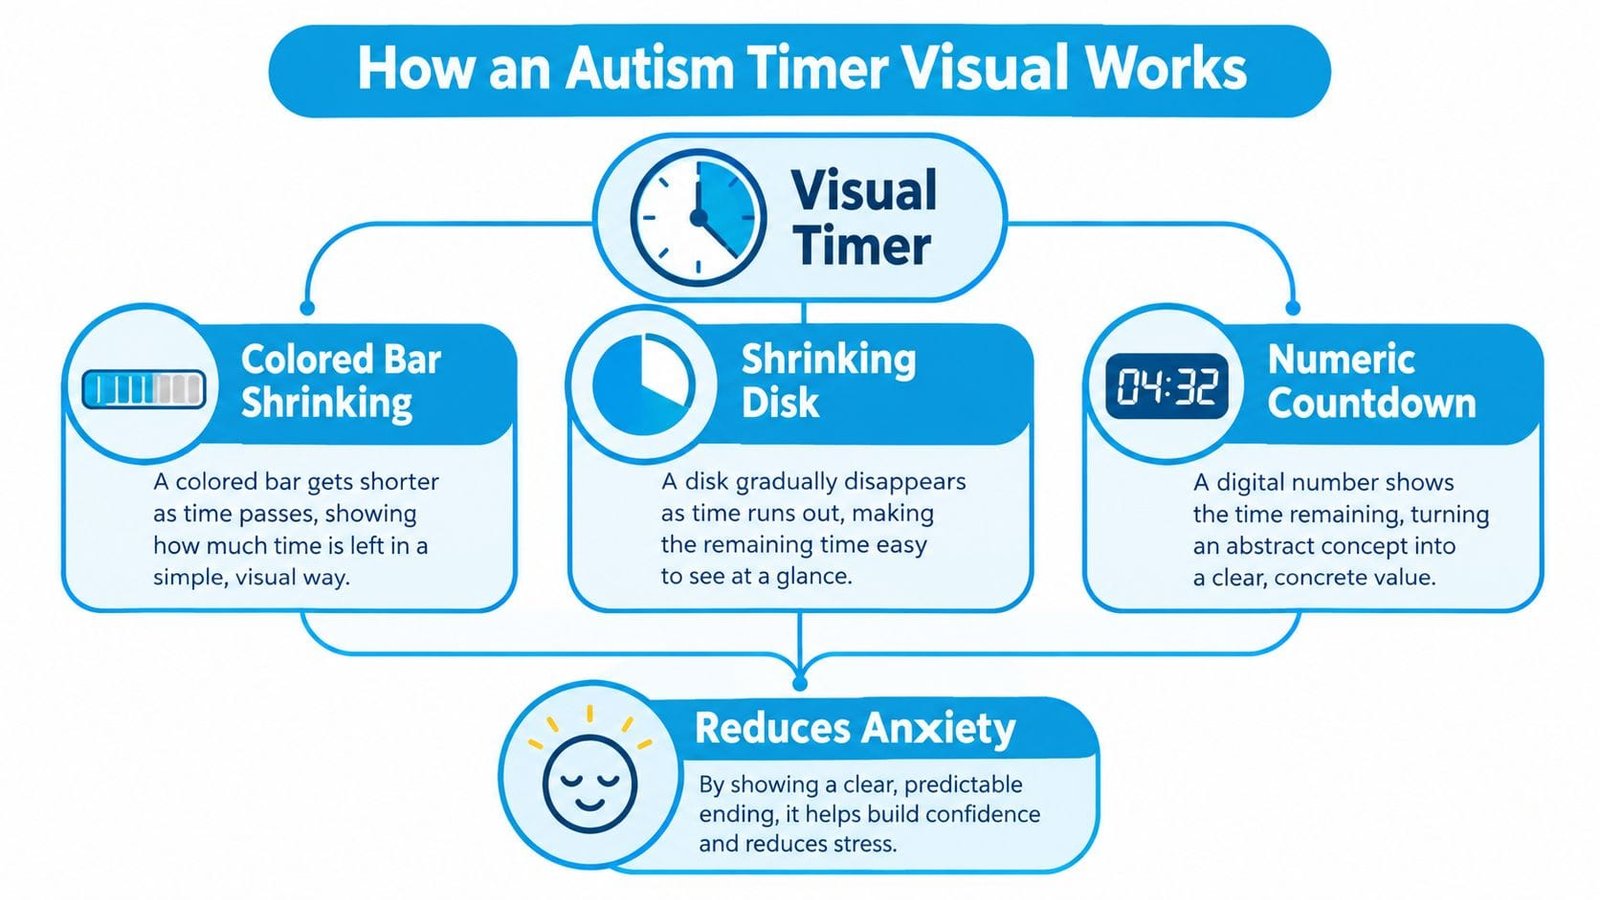
A simple way to introduce the cue
Start by showing the timer while the child is calm. Name what it means in consistent language, such as, “The red part gets smaller. When it's gone, tablet time is finished.” Then use it during an activity that already ends successfully, rather than introducing it for the most difficult transition of the day.
Keep the timer in the child's line of sight, but don't insist that they stare at it. The aim is to provide an available reference, not another demand. Indiana University's autism resource center describes visual timers as colorful, easy-to-read displays that can show how long remains before everyday events, and its transition guidance reports a case in which a visual timer supported a student's move from computer time to work time at several points during the day. Read the Indiana University transition guidance for examples of using the cue before the change.
The timer should lead to a clear next step. When the visual reaches the endpoint, point to a finished card, a picture of the next activity, or a first-then board. Without that bridge, the child may understand that something ended but still have no idea what to do next.
Choosing the Right Type of Visual Timer
The right tool depends less on the child's diagnosis than on how they process visual information, sound, numbers, and change. A child who can read numbers may appreciate a digital countdown, while another child may become anxious watching the final seconds disappear. Someone who finds electronics distracting may respond better to silent sand.
| Timer Type | Best For | Key Feature |
|---|---|---|
| Digital colored-disk timer | Children who understand a clear visual endpoint and benefit from adjustable durations | A disk or bar shrinks continuously |
| Analog sand timer | Children who prefer a quiet, tangible display with no buttons or spoken alerts | Sand moves visibly from one chamber to another |
| Visual schedule board | Children who need help understanding what happens before and after the timed activity | Pictures or words connect the timer to the wider routine |
Digital countdown timers
A digital timer is flexible for bedtime, screen time, waiting, and classroom tasks. A large colored disk can be easier to interpret than changing numbers, particularly when the child doesn't yet understand clock concepts. Some devices include ticking, beeps, or flashing alerts, though those features may distract or overwhelm a child with auditory or visual sensitivity.
Try muting the sound first. You can provide the endpoint yourself with a calm phrase and a physical transition object, such as shoes for leaving or a finished card for cleanup. If the child fixates on the last seconds, choose a display that emphasizes the disappearing color rather than prominent numerals.
Sand timers
Sand is quiet and concrete. It has no charging cable, pop-up notification, or accidental button press, which makes it useful for a calm corner, toothbrushing, short waiting periods, or turn-taking. The trade-off is limited flexibility. A sand timer can't easily match every routine, and a child may tip it over or focus on the falling grains instead of the activity.
For families comparing durations and designs, Playz tips on choosing sand timers offer a practical starting point. Select a sturdy, clearly visible timer and treat the stated duration as an approximate support rather than a reason to argue over an exact second.
Schedule boards
A schedule board isn't a timer by itself. It answers a different question: what happens next? Objects, photographs, icons, and written words can all represent activities, so the board can grow with the child's communication and reading skills. Queensland's guidance on visual schedules and individualized supports also points toward matching the representation to the child's developmental level and tolerance for countdown information.
A first-then board may be a better starting point than a timer if watching time disappear causes distress. “First shoes, then car” gives a clear sequence without making the child monitor a moving display.
Building Predictable Routines Together
A timer becomes more useful when it is attached to a routine the child can recognize. The visual schedule shows the sequence, the timer shows how long one step lasts, and a short transition cue explains what happens next. This combination reduces the amount of information the child must process during a change.
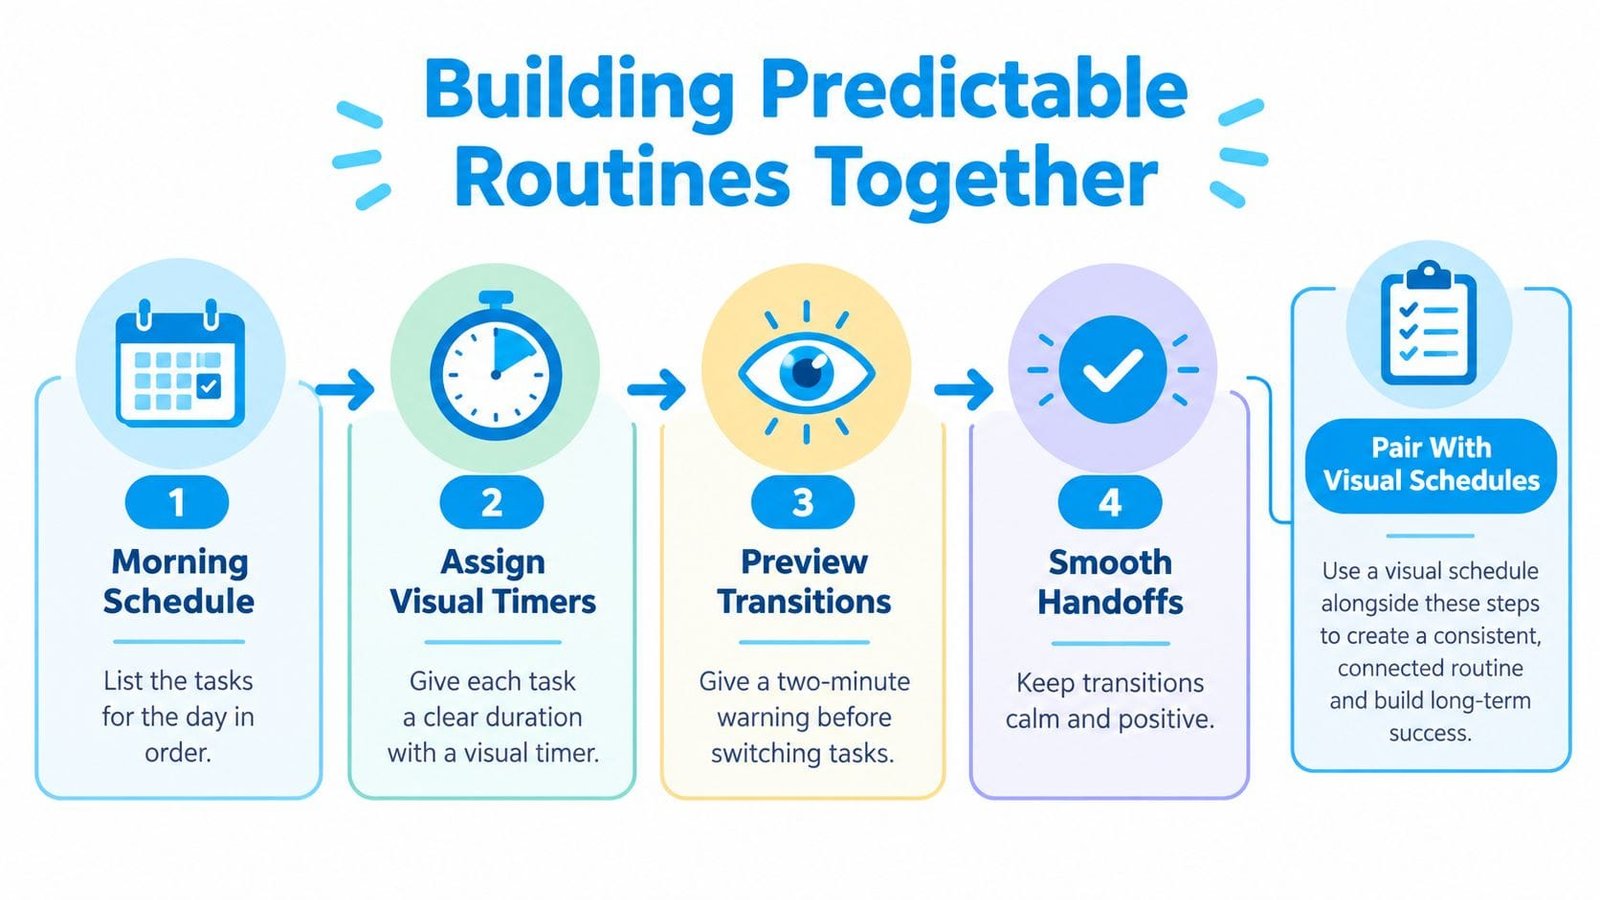
Put the pieces in order
For a morning routine, place pictures for toilet, clothes, breakfast, shoes, and leaving on a board, as shown in this guide to building a routine for your autistic child. Set the timer only for the step that regularly stalls, such as getting dressed. When it ends, point to the next picture and offer the item needed for that handoff. A single cue is easier to follow than several fresh instructions.
Match the timer to the child's sensory profile and developmental level. A silent visual display may suit a child who is sensitive to sound, while a larger, simpler representation may work better for a child still learning to connect symbols with activities. Log which timer, duration, cue, and transition outcome you used in Guiding Growth. Reviewing those entries can show whether the routine is becoming easier or whether the display needs adjustment.
Homework can follow the same structure. “First writing, then drawing” identifies the condition for the preferred activity, while the timer defines the work period. During meal preparation, use the timer for a short wait and show an available activity, such as looking at a book or choosing a plate.
Keep the endpoint consistent
Evidence for visual supports extends beyond classroom transitions. A 2024 literature review of visual schedules and academic on-task behavior identified 10 studies focused specifically on visual schedules for autistic individuals, with six meeting strong evidence criteria and one meeting acceptable criteria under Reichow's standards. The review also discussed a 2020 scoping review involving 29 families in a pilot home and community intervention. That study reported statistically significant improvements in parent-reported quality of life and autism-specific difficulties, including t28 = 3.09, p = 0.005 and t28 = 2.99, p = 0.006.
These findings support treating visual structure as a practical support, while individual fit still matters. Keep the sequence visible, make the next action available, and use routine logs to identify when the child needs a different timer, representation, or amount of processing time.
Practical Tips for Successful Implementation
Introduce the timer during a calm, successful activity. If the first use happens in the middle of a meltdown, the child may associate the display with pressure rather than predictability. Start with a duration the child can tolerate, then gradually use it for harder transitions once the meaning is familiar.
Use the same short cue every time. “Timer finished, shoes next” is easier to process than a long explanation delivered while the child is already upset. A Texas SPED Support guide to visual timers recommends short initial intervals, reminders as time decreases, a clear ending cue, processing time, and reinforcement for the next step.
Adjust the display to the child
- Start small: Choose a brief period that ends before frustration peaks. Success teaches the timer's meaning more effectively than a long interval followed by conflict.
- Show the next action: Put the finished card, shoes, cup, or worksheet beside the timer so the endpoint has a physical destination.
- Allow processing time: When the timer ends, pause. The child may need extra seconds to stop, orient to the adult, and begin the next movement.
- Reduce sensory load: Turn off ticking, alarms, or flashing effects if they compete with the child's attention. A silent display may be more useful than a feature-rich one.
- Reinforce cooperation: Notice the transition specifically, with language such as, “You checked the timer and moved to shoes.” Avoid turning every successful handoff into a large performance.
Resistance doesn't always mean the timer failed. The duration may be too long, the next activity may be unpleasant, or the timer may be visually intrusive. Some children need a partially hidden or filling display, while others need a first-then board before they can tolerate a countdown. A teacher-controlled countdown can also help when fixed numeric intervals are a poor fit, because Texas guidance on visual countdowns describes a flexible representation that doesn't depend on specific time increments.
The goal isn't perfect compliance at the alarm. The goal is a child who gradually understands what is ending, what comes next, and how to participate in the handoff.
Digital Solutions and App Integration
A tablet or phone can make a visual timer portable across rooms, school pickups, therapy appointments, and community outings. Digital tools may offer adjustable displays, remote control, silent mode, and custom sounds, but those conveniences also introduce notifications, screen distraction, and another device to manage. Choose the simplest interface that your child can understand without needing an adult to troubleshoot it.
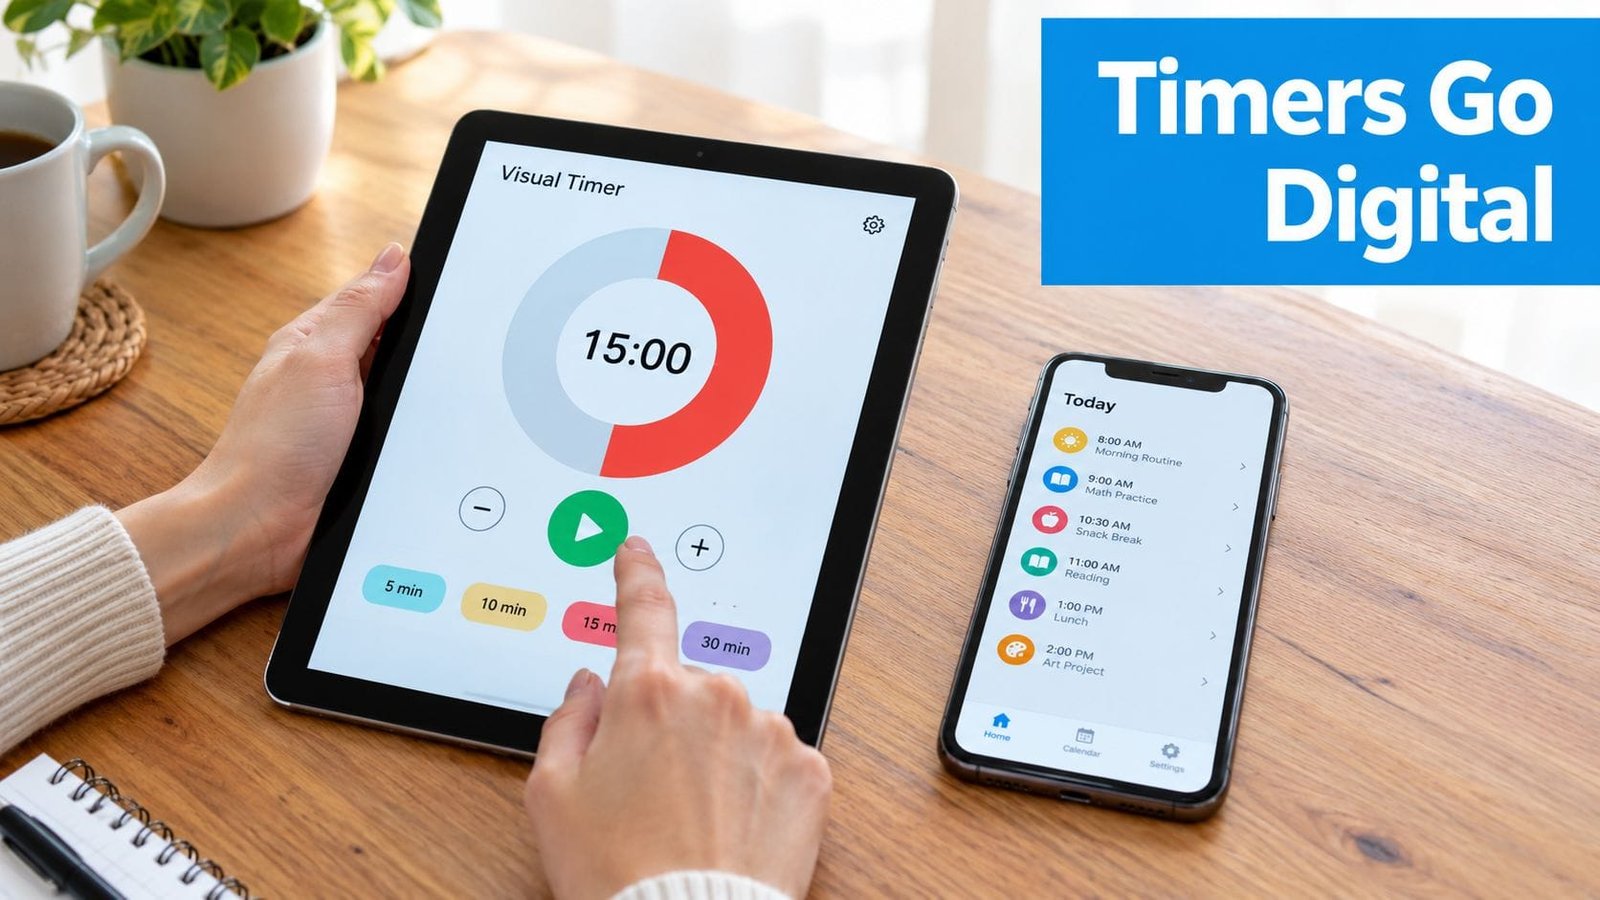
A dedicated timer answers, “How long is left?” A tracking app answers, “What happened around this routine over time?” Those are different jobs, and combining them can reveal whether a transition is difficult because of the duration, the time of day, sleep, hunger, screen use, a particular setting, or the next demand. Structured notes are more useful than trying to reconstruct the week from memory during a therapy or school meeting.
An app such as this visual schedule solution for autism routines can complement a timer by organizing the surrounding sequence. Guiding Growth lets parents log behavior, sleep, meals, mood, screen time, medications, therapy, and triggers, including through voice-based entries. It also organizes patterns and creates summaries that can be shared for care discussions, while the timer itself remains the immediate transition cue.
Use the digital tool without making the child responsible for data collection. The adult can record whether the transition happened smoothly, what preceded the difficulty, and what support helped. Keep the observation short and neutral. “Tablet ended after timer, child cried, shoes offered, transition completed after processing time” gives a clearer record than “bad morning.”
A short demonstration can help caregivers understand how visual timing fits into a larger routine:
Technology should reduce duplication, not create another task that exhausts the parent. If a physical timer works reliably, keep using it. Add digital tracking when the information will help you adapt the routine, communicate with the care team, or identify patterns that aren't obvious day to day.
Moving Toward Calmer Days
An autism timer visual is more than a countdown gadget. It gives a child a visible endpoint when spoken time is too abstract, and it gives the adult a consistent way to prepare for change without repeating warnings until everyone is overwhelmed. The strongest results come from pairing the timer with a clear next step, not from expecting the device to manage the entire transition.
Choose according to the child in front of you. A colored disk may be easier than numbers, sand may be calmer than a beeping digital display, and a first-then board may be more appropriate when a countdown creates pressure. A visual schedule can show the whole sequence, while the timer supports the one step that needs a concrete duration.
Consistency matters, but flexibility matters too. If a child watches the timer anxiously, hide part of the display or try a filling format. If the child ignores it, move it into the line of sight, shorten the interval, or pair it with an object and a simple phrase. If transitions remain difficult, log the surrounding conditions rather than assuming the timer is the problem.
The broader aim is confidence through predictability. Each supported handoff gives the child another opportunity to learn that activities end, the next activity can be understood, and adults will follow through calmly. Over time, the support may become less necessary for familiar routines, even though some transitions will still require preparation and accommodation.
Guiding Growth gives parents one place to log routines, triggers, sleep, meals, screen time, and behavior so they can see what helps transitions over time and prepare clearer conversations with the care team. Visit Guiding Growth to turn daily observations into organized, usable support for your child's routines.