You're probably looking at a pile of possible materials right now. A wooden board, a zipper from an old jacket, a light switch from the hardware store, maybe a few textured scraps you saved because they felt “useful someday.” The hard part isn't attaching things to a board. The hard part is building something your child will return to, tolerate, enjoy, and use for regulation.
That's where most sensory board advice falls short. It treats the project like a craft. For autistic children, a sensory board works better when it's built like a tool. The textures, sounds, resistance, movement, and layout should match a real need, whether that's calming after school, warming up hands for fine motor work, tolerating new tactile input, or creating a predictable place to decompress.
A good board doesn't need to be fancy. It needs to be intentional. The best ones are safe, sturdy, and closely matched to the child in front of you.
Table of Contents
- Understanding Your Child's Unique Sensory Needs
- Designing a Purposeful and Engaging Board
- Sourcing Safe Materials and Interactive Elements
- Assembling Your Child's Sensory Board
- Integrating the Board into Daily Routines and Play
- Tracking the Board's Impact with Guiding Growth
Understanding Your Child's Unique Sensory Needs
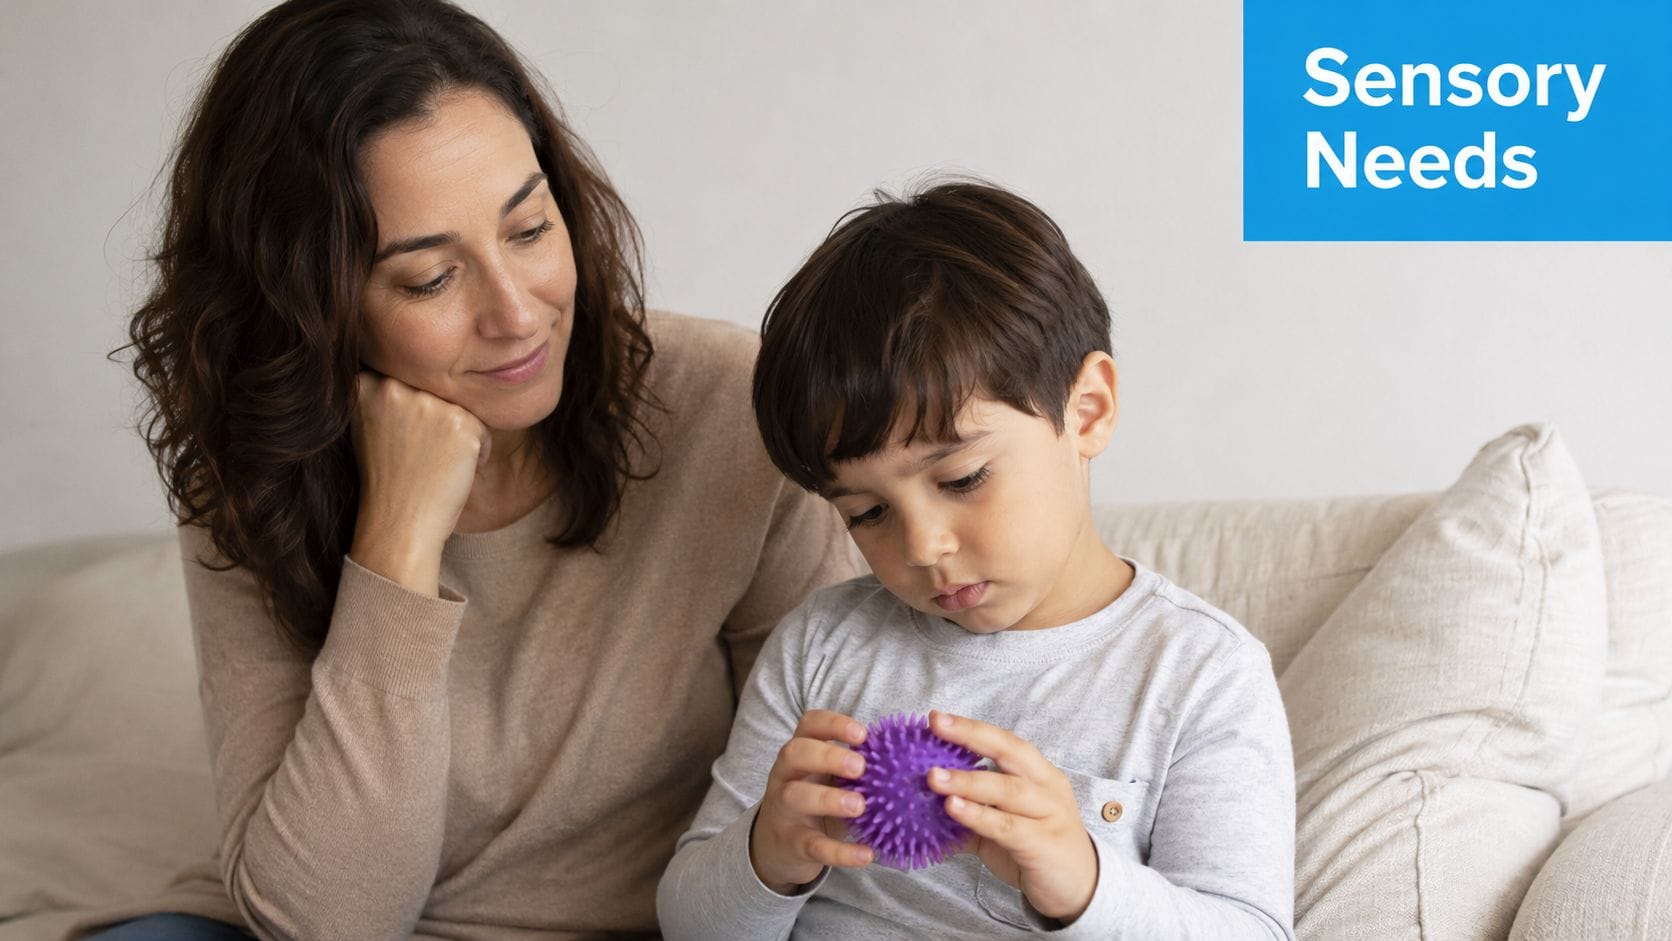
Before you buy a latch or cut a board, slow down and observe. Sensory processing differences are a hallmark of autism, with up to 96% of autistic individuals showing them, and about 74% of autistic children having documented sensory features according to the HANDS in Autism overview. That matters because a sensory board shouldn't be built from guesswork. It should reflect the child's real sensory profile.
Start by watching for patterns
Most parents already notice patterns, but they often notice them in the middle of stress. That makes it harder to connect the dots. A calmer approach is to become a sensory detective for a week.
Look for two broad patterns:
- Sensory seeking. A child may crave movement, rub textures repeatedly, press hard on objects, flick switches over and over, or seek sound and vibration.
- Sensory avoiding. A child may pull away from sticky textures, resist certain fabrics, cover ears, avoid messy play, or stop engaging when too many elements compete for attention.
Don't stop at “likes” and “dislikes.” Watch the context too.
- Before the behavior. Was the room noisy, bright, crowded, or rushed?
- During the behavior. Did your child flap, vocalize, freeze, avoid touch, or repeat an action?
- After the behavior. Did they look calmer, more dysregulated, more focused, or ready to move on?
Practical rule: If a child repeatedly returns to one kind of sensory input, that's usually a clue. If they repeatedly recoil, that's also a clue.
A quick log is often more useful than memory. Record what your child touched, how long they stayed with it, and whether it helped them regulate. If you want a structured way to notice those patterns, this guide to identifying sensory triggers in autism can help organize what you're seeing in daily life.
Turn observations into design decisions
A good sensory board starts with a short profile, not a shopping list. Keep it simple. Write down:
| What you observe | What it may suggest | Board implication |
|---|---|---|
| Rubs smooth surfaces | Calming tactile input | Add satin ribbon, smooth wood, soft fleece |
| Seeks clicking or toggling | Craves cause-and-effect input | Add real switches, buttons, toggles |
| Avoids scratchy textures | Low tactile tolerance | Start with soft, predictable materials |
| Gets stuck on one object | Needs repetition and predictability | Use a small number of high-value elements |
This step protects you from building a board full of items your child won't use. It also keeps you from adding “sensory variety” that only creates overload.
For toddlers, this process is especially important. Sensory boards are often most useful when introduced between ages 1 and 3, and they tend to work best when the stimulation is calming, predictable, and socially usable rather than random or chaotic. In practice, that means fewer gimmicks and better matching.
Designing a Purposeful and Engaging Board
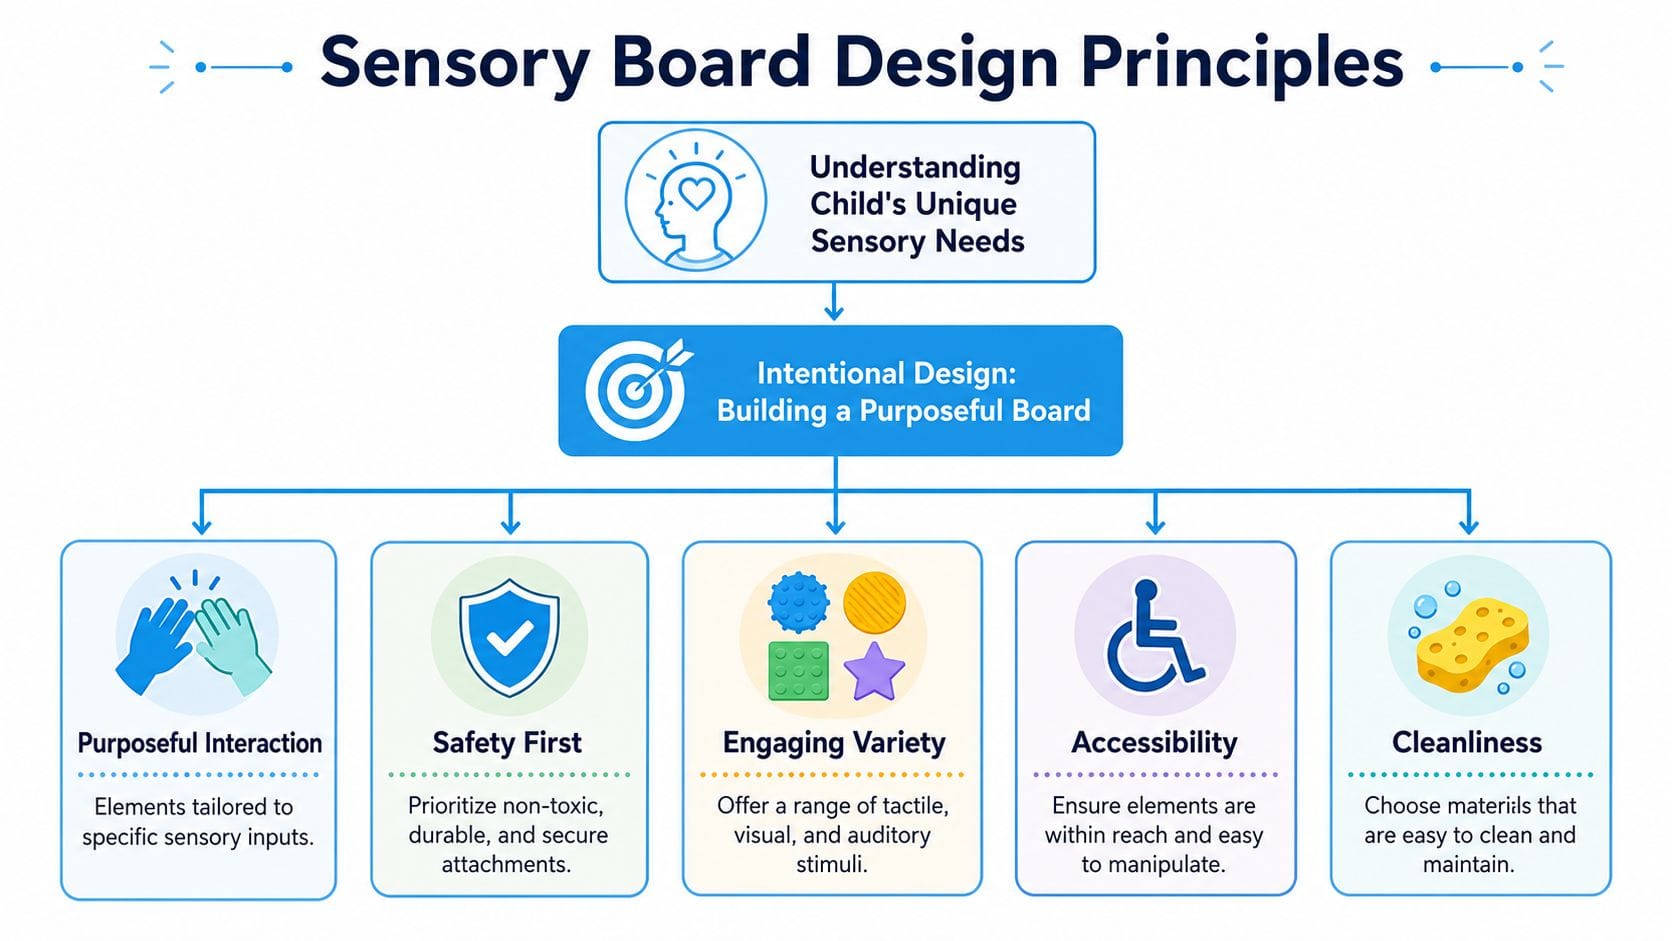
A lot of sensory boards look impressive and still don't do much. They're colorful, crowded, and full of textures, but they don't support regulation, fine motor practice, or meaningful interaction. That's the difference between a decorative board and a therapeutic one.
Functional beats decorative
One of the most useful realities to keep in mind is this: 68% of commercial sensory boards fail to include functional elements, even though functional parts matter most for motor and cognitive skill transfer, according to this review of sensory board design. That matches what many therapists and parents notice quickly. A felt square may be tolerated. A real latch, zipper, or working light switch often gets repeated use.
Functional elements ask the hands and brain to do something together. They create resistance, sequence, feedback, and purpose.
Useful examples include:
- Real switches that click and change something
- Latches and locks that require planning
- Zippers and buckles that build bilateral coordination
- Turning knobs that add resistance and motor control
- Simple doors or flaps that reveal a picture or mirror underneath
A child usually stays with an object longer when it responds to their action in a clear, predictable way.
Build zones instead of clutter
Instead of covering every inch, divide the board into a few jobs. I usually think in zones.
One area can be calming. Another can be more alerting. A third can focus on hand skills.
Here's a simple planning model:
| Zone | Good choices | Best for |
|---|---|---|
| Calming area | fleece, satin ribbon, smooth wood disc, slow spinner | settling, transitions, quiet regulation |
| Fine motor area | zipper, buckle, snap, twist bolt, latch | hand strength, bilateral use, motor planning |
| Cause-and-effect area | switch, button, bell, flap door | attention, repetition, engagement |
Spacing matters too. If the parts are too close together, little hands get frustrated. If every item is bright, noisy, and high-interest, the board becomes a wall of competing demands.
A better sensory board for autism usually has contrast with restraint. One rough item beside one smooth item. One sound source, not five. A visual element that moves, but doesn't flash constantly.
Adjust for tactile hyper-reactivity
Some children won't benefit from a “more textures” approach. They'll shut down or avoid the board altogether. That's especially important for children with strong tactile aversion. Recent guidance highlighted in this sensory integration overview notes that 42% of autistic children with sensory processing disorder experience hyper-reactivity to tactile stimuli, which is why graded exposure matters.
If your child is easily overwhelmed, start with low-intensity materials:
- Soft fleece
- Smooth plastic
- Flat silicone
- Finished wood
- Wide ribbon with no scratchy edge
Then build tolerance gradually. Don't place the roughest item front and center. Put it off to the side, make it optional, and keep sessions short and child-paced.
Worth remembering: A board that gets used gently is more therapeutic than a “perfect” board that gets avoided.
This is also where less really is more. A small board with four well-chosen items often works better than a large board loaded with twelve mismatched ones. You can always add later. It's much harder to rebuild trust if the first experience feels overwhelming.
Sourcing Safe Materials and Interactive Elements
Good design falls apart fast if the materials are flimsy or unsafe. The board has to survive pulling, twisting, mouthing, dropping, and repetitive use. If parts break, wobble, splinter, or come loose, the board stops being therapeutic and starts being a hazard.
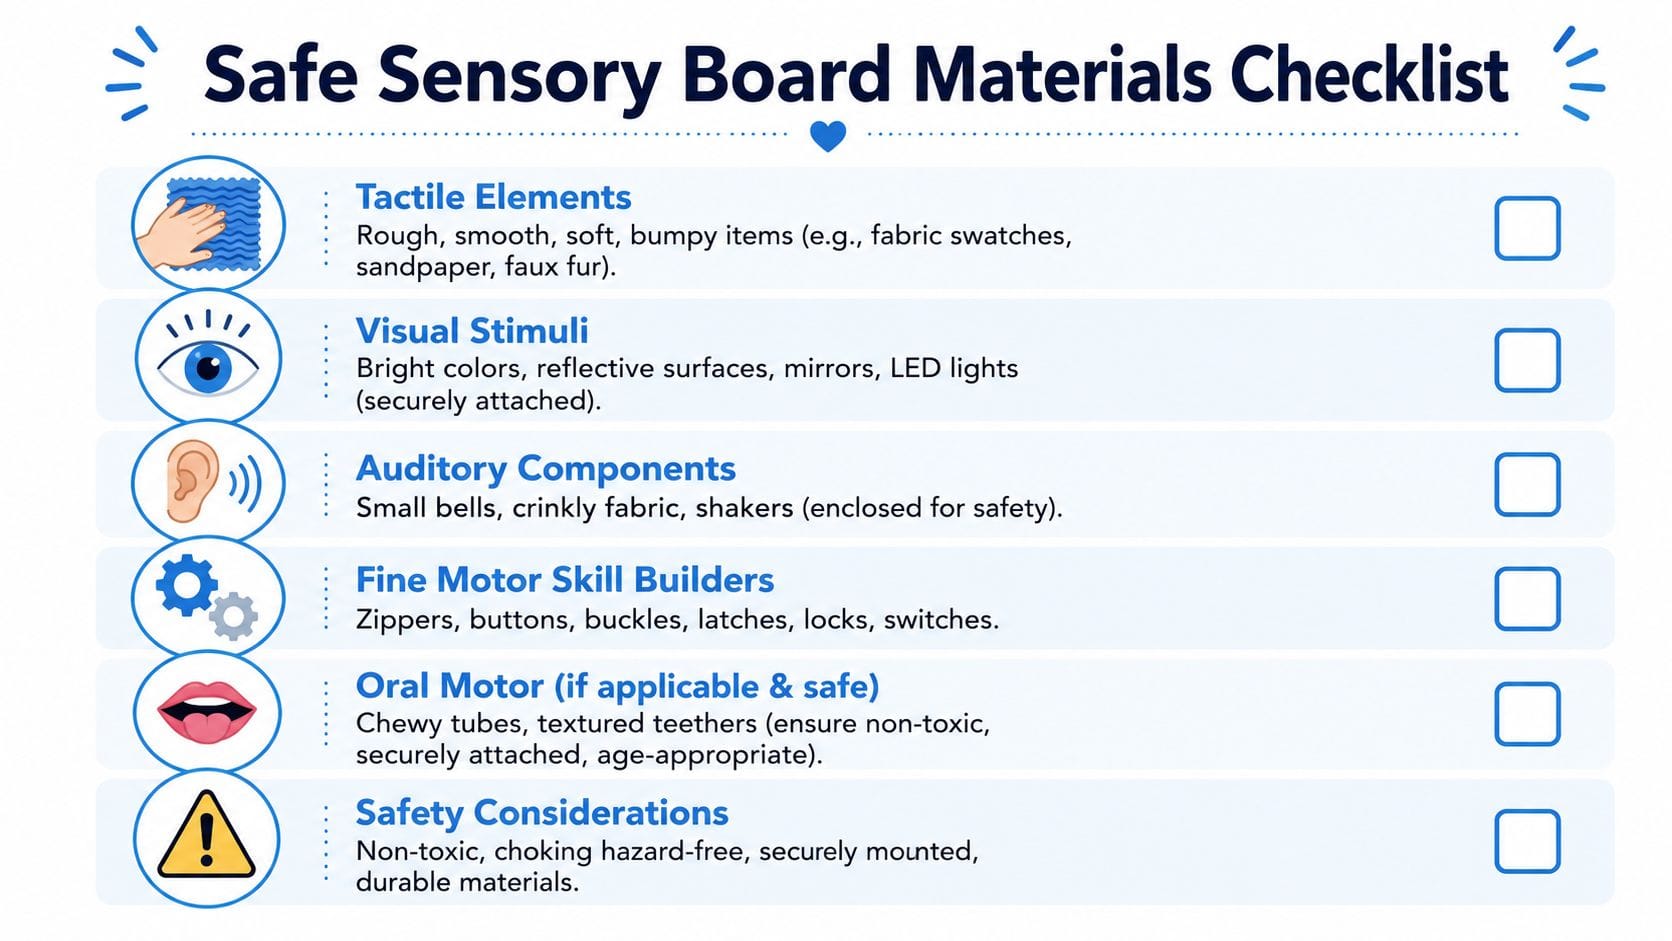
Start with this checklist while you shop.
Choose the base first
The backboard affects everything else. A solid wood board is the easiest choice when you want durability and secure mounting. Plywood works well if edges are sanded and sealed with a child-safe finish. Foam board is lightweight, but it doesn't hold screws well and won't tolerate heavier components.
If the board will hang on a wall, keep weight in mind. If it will travel between rooms, reduce the number of heavy metal pieces.
A good rule is simple. Heavy components need a board that can handle torque and repeated force.
Later, if your child also needs oral sensory support outside the board itself, this roundup of sensory chew toys for autism can help you think through safe options for a different sensory need.
Pick parts by sensory job
Don't shop by aisle alone. Shop by function.
This video shows the kind of hands-on elements many parents use as inspiration before building:
Then sort your items into categories:
- Tactile input. Fabric swatches, faux fur, silicone pads, brush strips, smooth tile samples, cork, felt.
- Auditory feedback. Soft bells, enclosed shakers, crinkly fabric, a quiet click switch.
- Visual interest. Mirror acrylic, a slow spinner, contrasting shapes, reflective but non-breakable surfaces.
- Fine motor work. Buckles, latches, zippers, gears, locks, knobs, shoelace eyelets.
Research on board construction supports choosing durable, interactive elements, with one study reporting a 17.2-point increase in motor coordination scores after a 12-week intervention, and 90% of cases showing improved behavior from the calming, controlled setup described in this Scientific Reports article.
Safety checks before anything gets mounted
This part isn't optional.
- Check attachment strength. If you can rip it off with one determined pull, don't use it.
- Remove sharp edges. Sand wood, file metal, and cap anything that could scratch skin.
- Skip choking hazards. Tiny loose beads, unsecured bells, and brittle plastics don't belong on a child's board.
- Use non-toxic finishes. Paints, sealants, and adhesives should be child-safe and fully cured.
- Test cleanability. If you can't wipe it down, it probably won't stay usable long.
Boards that hold attention usually include items the child can manipulate repeatedly without failure. That means choosing parts made to be handled, not decorations meant to be looked at.
Assembling Your Child's Sensory Board
This is the point where the project starts to feel real. The board is cut, the parts are spread out, and you're deciding what goes where. It helps to think like a builder for a few minutes and like your child for the rest of the time.
Lay it out before you attach anything
Put every piece on the board without fastening it. Move items around until the layout feels usable. Leave enough room for both hands. If your child has reduced motor planning, wide spacing often works better than a dense arrangement.
I like to place the most familiar item first. That becomes the entry point. Then I add one slightly more challenging item nearby and keep the highest-demand object off to the side. That sequence lowers frustration.
A simple arrangement often works well:
- top left for calming touch
- center for the main interactive feature
- lower area for latches, zippers, or knobs
- edge spaces left clear so hands can stabilize the board
If your child tends to fixate on one object, don't bury that object in the middle of competing choices. Give it room.
Match the fastening method to the object
Flat materials usually do well with strong adhesive, but moving parts need mechanical attachment. A fabric square can be glued. A latch, lock, or switch usually needs screws, bolts, or washers.
Use common sense based on the force the item will take:
- Soft textures can be attached with heavy-duty glue rated for the board material
- Zippers often hold best when stitched to fabric first, then mounted
- Locks, handles, and metal hardware should be screwed down
- Raised plastic items may need both adhesive and a backup fastener
After attaching each piece, tug it from different angles. Don't just test it the way you expect your child to use it. Test it the way a frustrated child might use it.
Let your child help in small ways
Children don't need to build the board to feel ownership. They just need a real role.
A toddler might choose between two fabrics. An older child might decide whether the spinner goes on the left or right. A child who dislikes direct demands might hand you pieces while watching. That still counts.
I've seen children reject a finished board and then happily engage with one they helped arrange. The sensory profile may be the same, but the sense of control changes the response. Even one small choice can make the board feel more predictable and less imposed.
When the board is assembled, leave it alone for a moment before introducing it. Let the adhesives cure fully. Tighten every screw again. Wipe the surface. Then present it without pressure. Offer it. Don't perform it.
Integrating the Board into Daily Routines and Play
A sensory board doesn't earn its place because it exists. It earns its place because it helps at the right moments. The easiest way to make it useful is to connect it to predictable parts of the day.
Use the board at predictable moments
Think about transition points first. Those are often where regulation support matters most.
A few examples:
- Before school when hands need a quiet, grounding activity
- After school when the nervous system is overloaded
- Before homework or table tasks when the child needs help shifting into focus
- After therapy when they may need decompression rather than more demands
- Before bedtime routines if calming tactile input helps settle the body
The board works better when it's available in a consistent place. A quiet corner, hallway nook, or low wall near the play area often works better than moving it around all day.
Let the child control the input
Controlled sensory input changes the experience. A child who can choose when to touch, turn, press, slide, or pause often regulates more effectively than a child being directed through every interaction. Research summarized in this article on controlled sensory environments found that when autistic children had control over sensory changes, they showed significant increases in attention and reductions in repetitive motor behaviors and stereotyped speech.
That doesn't mean leaving everything unstructured. It means offering the board as a predictable option instead of a mandatory task.
Try phrases like:
- “Your board is ready if your hands want it.”
- “Do you want the soft side or the click side?”
- “You can use it until your body feels ready.”
Some children use a sensory board best in short bursts. Others return to it throughout the day. Both patterns can be useful.
It also helps to notice when the board isn't the right tool. If your child is already in full distress, a board may be too much. In that moment, reducing demands, light, sound, or verbal input may matter more. The board tends to work best before overwhelm peaks or during recovery after it starts to pass.
Tracking the Board's Impact with Guiding Growth
Building the board is only half the job. The other half is finding out whether it's doing what you hoped it would do.
That matters because families often make two mistakes. First, they assume a child “liked” the board because they touched it once. Second, they give up too soon because the board didn't create instant change. Neither tells you much. What matters is whether the board supports regulation, attention, transitions, or functional participation over time.
Why tracking matters
Structured sensory support works best when it's individualized and monitored. In a controlled trial, children in Ayres Sensory Integration therapy showed a 30% greater reduction in autistic mannerisms, as reported in this PubMed Central study summary. The useful takeaway isn't that every home board should mimic a clinic. It's that sensory tools are stronger when adults pay attention to what changes, what doesn't, and what needs adjusting.
If you don't track, you're left with impressions. Impressions are noisy. One hard evening can make a useful tool look ineffective. One good afternoon can make an unhelpful tool look magical.
What to track after the board is built
You don't need a formal research system. You need consistency.
Track things like:
- Time of use. Did your child use it before dinner, after school, or during transitions?
- Duration. Was it a quick check-in or a longer regulation period?
- Preferred elements. Did they seek the zipper, the fleece, the switch, or the latch?
- Behavior before use. Restless, avoidant, upset, unfocused, sensory-seeking
- Behavior after use. Calmer, more organized, still agitated, ready for the next task
You can also connect board use to wider daily patterns such as meltdowns, sleep quality, transitions, hand flapping, vocalizations, or demand avoidance. That's often where the true value shows up. Sometimes the board doesn't look dramatic in the moment, but evening routines go more smoothly on days it was used after school.
Use the data to revise the board
Tracking helps you answer practical questions.
- Is the “calming” section calming?
- Does one object lead to focused use while another gets ignored?
- Does the board help before transitions, or only after stress has already built?
- Is one texture tolerated for a few seconds but never chosen voluntarily?
When you review patterns, changes become obvious. You may remove one item, duplicate another, lower the board height, or simplify the layout. That's how a homemade board becomes a personalized support, not just a one-time project.
If you want a structured way to monitor those changes, this sensory milestone tracking tool is built for exactly that kind of day-to-day pattern recognition. It's especially useful when multiple caregivers need to notice the same signals and respond consistently.
A sensory board for autism works best when it stays flexible. Children change. Their tolerance changes. Their interests change. Their regulation needs change. Tracking gives you a reason to adjust based on evidence, not frustration.
If you want one place to log sensory patterns, routines, meltdowns, sleep, and what helps, Guiding Growth makes that process much easier. It gives parents and caregivers a practical way to record what happens, notice patterns across the day, and share useful insights with the other adults supporting the child. That turns a sensory board from a hopeful DIY project into something you can evaluate and improve with confidence.