You're standing by the door, one shoe on, one lace flopping, and your child is already frustrated before the day has even started. That moment usually gets filed under “stubborn,” but more often it's a sign that the skill chain is too big, the prompts are too messy, or one hidden prerequisite is missing. A task analysis for tying a shoe gives you a way to stop arguing with the whole skill and start teaching the parts that matter.
Table of Contents
- Why Tying a Shoe Is Really Five Skills in Disguise
- A Step-by-Step Task Analysis Using the Two-Loop Method
- Picking the Right Chaining Method for Your Child
- Prompting and Fading Without Taking Over
- Tracking Progress So You Can See the Trend
- Troubleshooting the Three Failure Points That Stall Progress
- Bringing It All Together Into a Plan You Can Actually Run
Why Tying a Shoe Is Really Five Skills in Disguise
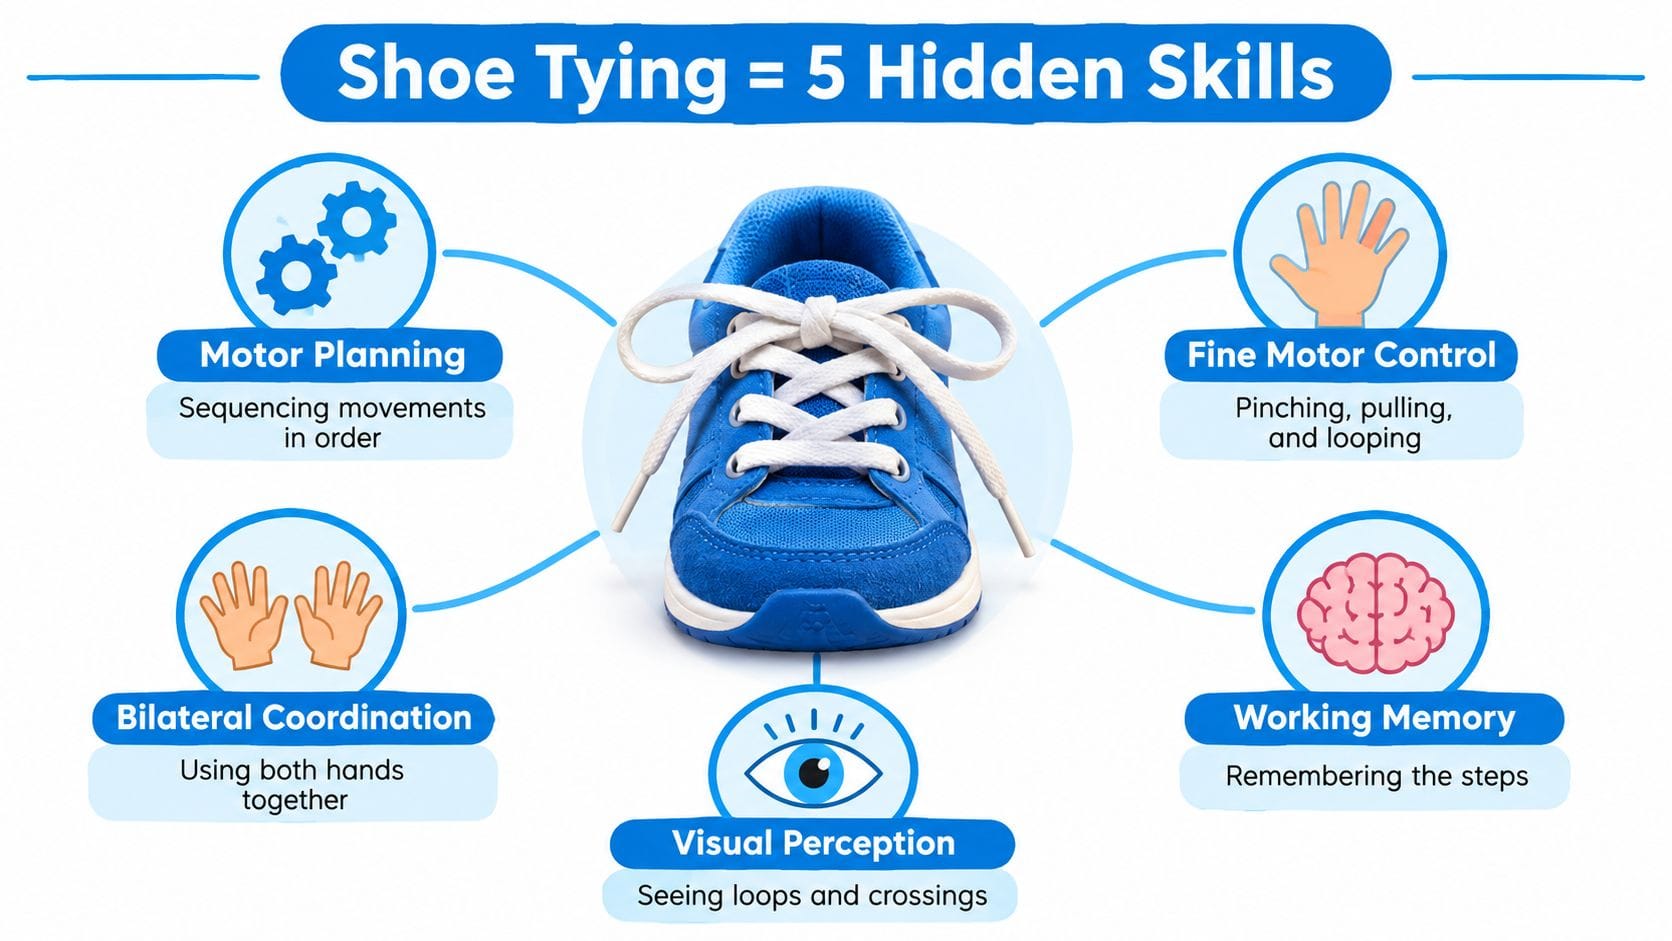
A child who “can't tie shoes” usually isn't missing one magical shoe-tying gene. They're getting stuck in a chain that asks for bilateral coordination, fine-motor control, visual-motor integration, working memory, and attention sequencing all at once. That's why a task analysis for tying a shoe matters so much, it turns a big, slippery routine into smaller behaviors you can see, prompt, and score.
Start with the hidden load, not the knot
Most public shoe-tying guides jump straight to the bow. In practice, the child may never reach the bow if they can't keep both hands working together, hold a pinch long enough to tuck, or remember where the lace was supposed to go next. Task-analysis materials for shoe tying consistently treat it as a chain of discrete behaviors, not one skill, and that matches what behavior analysts and OT teams do with other adaptive routines such as brushing teeth or zipping a jacket task-analysis/chaining overview.
A quick home screen helps you avoid teaching a chain the child isn't ready for yet.
- Bilateral coordination check: Give a paper strip or two crayons, then watch whether both hands can work at the same time without one hand freezing up.
- Pinch strength check: Ask the child to pick up a lace or string and hold it near the tip, then see whether the grasp collapses immediately.
- Visual-motor check: Place a sticker, dot, or line on a shoe and see whether the child can track from one point to another with their fingers.
- Attention and sequencing check: Give two or three simple actions in order, then notice whether the child can complete them without losing the thread.
Practical rule: if the child can't hold the lace, cross the lace, or remember the next move, the problem isn't “shoe tying” yet. It's an upstream skill.
Sensory resistance can look like refusal
There's another reason this skill stalls. Lace texture, pressure on the fingers, or the feeling of the lace sliding may be enough to trigger avoidance. That can look like noncompliance from the outside, but the issue may be tactile discomfort or motor fatigue. When I've seen progress after a long stall, it's often because the teaching team stopped pushing the full chain and spent a short block building the exact prerequisite that was missing.
The point isn't to lower expectations. It's to set the child up to win one part at a time, then reuse that breakdown for other daily living skills later. Once families understand how a chain is built, the same logic works for handwashing, dressing, packing a backpack, and every other routine that looks simple until you ask a child to do it independently.
A Step-by-Step Task Analysis Using the Two-Loop Method
A clean 10-step task analysis is usually enough for the traditional two-loop bow, even though some teaching materials use 9 steps and others use 11 steps because they split or combine the first knot and bow-making differently intervention study and video prompting example 11-step example. That variation isn't a problem. It's a reminder that the best sequence is the one your learner can see, follow, and master.
Use observable behavior, not vague directions
For parents, the best rule is simple. If you can't point to the exact movement and say whether it happened, the step is still too broad. A useful task analysis for tying a shoe names the hand, the action, and the expected result.
| Step | Observable Behavior | Common Error to Watch |
|---|---|---|
| 1 | Holds one lace in each hand | Lets both laces drop or tangles them before starting |
| 2 | Crosses one lace over the other to form an X | Crosses too low, too loose, or with the wrong lace orientation |
| 3 | Pulls the crossed laces through to make the first knot | Leaves the knot loose or skips the tuck |
| 4 | Tightens the first knot | Stops before the knot is snug |
| 5 | Forms one loop with the dominant or preferred hand | Makes a loop that collapses or is too small to hold |
| 6 | Pinches the loop near the base | Pinches too far from the base and loses control |
| 7 | Wraps the other lace around the loop | Wraps the lace the wrong direction or misses the base |
| 8 | Tucks the lace through the opening | Misses the hole or loses the opening completely |
| 9 | Pulls the second loop through | Pulls too hard and distorts the loop |
| 10 | Pulls both loops evenly to tighten the bow | Finishes with a loose bow that comes undone |
The fine-motor pinch and tuck often live in the middle of the chain. A teaching guide from the literacy and OT space recommends making the pinch point small and controlled, then using the opposite finger to tuck under the crossed laces before pulling through task analysis guidance. That matters because many kids can do the gross movements but lose the lace during the hidden manipulation inside the knot.
A child who can cross laces but can't keep the loop stable doesn't need more yelling. They need a smaller step and better prompting.
If your child can complete steps 1 through 4 independently, pause there and build a separate mini-chain for the bow. That split often reduces frustration fast, especially when the learner gets stuck on the loop-making part. For a related example of breaking a routine into teachable pieces, the handwashing analysis at handwashing task analysis shows the same logic in another daily living skill.
Picking the Right Chaining Method for Your Child
The method matters as much as the step list. A child who melts down when too much is demanded at once usually does better with backward chaining, because they get the payoff of a finished bow early. A child who enjoys predictable routines and can tolerate many repetitions may do well with forward chaining or total-task chaining, where every step is practiced each trial.
Match the method to the learner, not the parent's preference
Forward chaining builds from the start of the routine. Backward chaining starts at the end and works in reverse. Total-task chaining asks the child to attempt the whole sequence each time, with prompts as needed. All three can work, but they don't feel the same to the learner.
- Forward chaining: Best when the child likes clear beginnings and can keep attention on the first step long enough to earn success. It's a good fit when you want to build independence from the start of the chain.
- Backward chaining: Best when the child is motivated by seeing the finished shoe right away or gets discouraged if the routine feels endless. It gives the child natural reinforcement fast.
- Total-task chaining: Best when the child can tolerate repeated practice across the whole sequence and benefits from consistent exposure to every step.
Several ABA and OT teaching materials also separate the first knot from the bow because those are different motor patterns first knot as distinct subskill. That split is often the smartest move for children who can get the knot secure but lose the plot when the loop sequence starts.
For families who like comparing teaching methods across routines, the logic is similar to the way potty training methods compared lays out different learning paths. The routine changes, but the decision point is the same. Which method lowers frustration while still moving the child toward independence?
Make the first win the right kind of win
If your child gets overwhelmed by long verbal directions, don't start with total-task chaining and hope for the best. If your child becomes rigid when one step is mastered before the next begins, forward chaining can feel tedious. Backward chaining often works well when the final step is emotionally rewarding, because the child gets to finish what they started.
The best fit usually comes down to three things, attention span, motor profile, and how quickly the child picks up the last steps. If you're not sure, start with the method that lets the child contact success fastest without sacrificing the step data you need. A short trial tells you more than a long debate.
Prompting and Fading Without Taking Over
Over-helping is one of the fastest ways to stall this skill. The child stops thinking through the chain because adult hands have started doing the thinking for them. A better plan is to use the least intrusive prompt that still gets the step done, then fade that support in a predictable way.
Keep the prompt hierarchy clean
A simple hierarchy for shoe tying usually runs from most intrusive to least intrusive, full physical, partial physical, hand-over-hand on a single finger, model, gesture, positional, and finally independent. The goal isn't to hover at the top of the ladder. It's to move down the ladder as soon as the child can respond without losing accuracy.
A few practical examples help.
- Use full physical only when the child can't initiate the motion safely or at all.
- Use model prompting when the child can watch and copy part of the sequence but gets lost after the first action.
- Use gesture or positional prompts when the child understands the step but needs a visual cue to keep the lace where it belongs.
- Use independent trials when the child completes a step with no support across repeated attempts.
The visual guide at visual learner strategies pairs well with shoe tying because many children do better when the sequence is shown instead of spoken. That's especially true for learners who process better through pictures, icons, or a simple checklist attached to the shoe itself.
Pick the point where you stop helping
Backward chaining fits children who need a strong finish and immediate success. Forward chaining fits children who can tolerate learning from the start and like predictability. Total-task chaining fits children who benefit from seeing the whole routine every time, as long as the prompt level doesn't drift upward when the child hesitates.
Don't rescue every pause. A two-second wait can tell you whether the child knows the step or has been trained to wait for help.
The rule of thumb I use is this. If the child starts the movement and then stalls, wait briefly before stepping in. If the child shows no orientation to the task at all, prompt sooner and make the support explicit. The mistake isn't waiting too long or prompting too soon. The mistake is doing both inconsistently.
Tracking Progress So You Can See the Trend
A shoe-tying plan gets much easier when the data is simple enough to use on a busy day. You don't need a spreadsheet that feels like a second job. You need a record that shows what step was reached, what prompt level was used, and whether the child was moving toward more independence.
Use a short data sheet that answers one question
A practical sheet can hold just a few fields.
| Date | Trial | Step Reached | Prompt Level | Percent Independent |
|---|---|---|---|---|
That format keeps the focus where it belongs, on what happened during the session. If a child completes steps 1 through 4 alone but needs a model for step 5, that matters. If they need the same prompt every time on the same step, that matters too. The trend tells you whether you're fading help, holding steady, or teaching too much at once.
The behavior-tracking workflow at behavior tracking app is useful here because it keeps logs, prompt notes, and progress photos in one place instead of scattered across notebooks and text threads. That's especially helpful when multiple caregivers are teaching the same chain in different settings.
Read the pattern, not just the day
One rough session doesn't mean the plan failed. A week of repeated struggle on the same step means you should look closer at the step itself. Sometimes the issue is prompt dependence. Sometimes it's a sensory problem, a motor-planning gap, or a chain that got too long too fast.
The YouTube lesson below is useful because it shows how to keep the teaching sequence visible while you collect information, not just after the fact.
Track the smallest useful unit. If you only write “worked on shoes,” you'll miss the exact step that needs the next prompt change.
When the data starts showing more independence on one step, move the teaching goal forward. When the same step keeps failing despite good prompting, revisit the prerequisite skill or simplify the chain before adding more practice.
Troubleshooting the Three Failure Points That Stall Progress
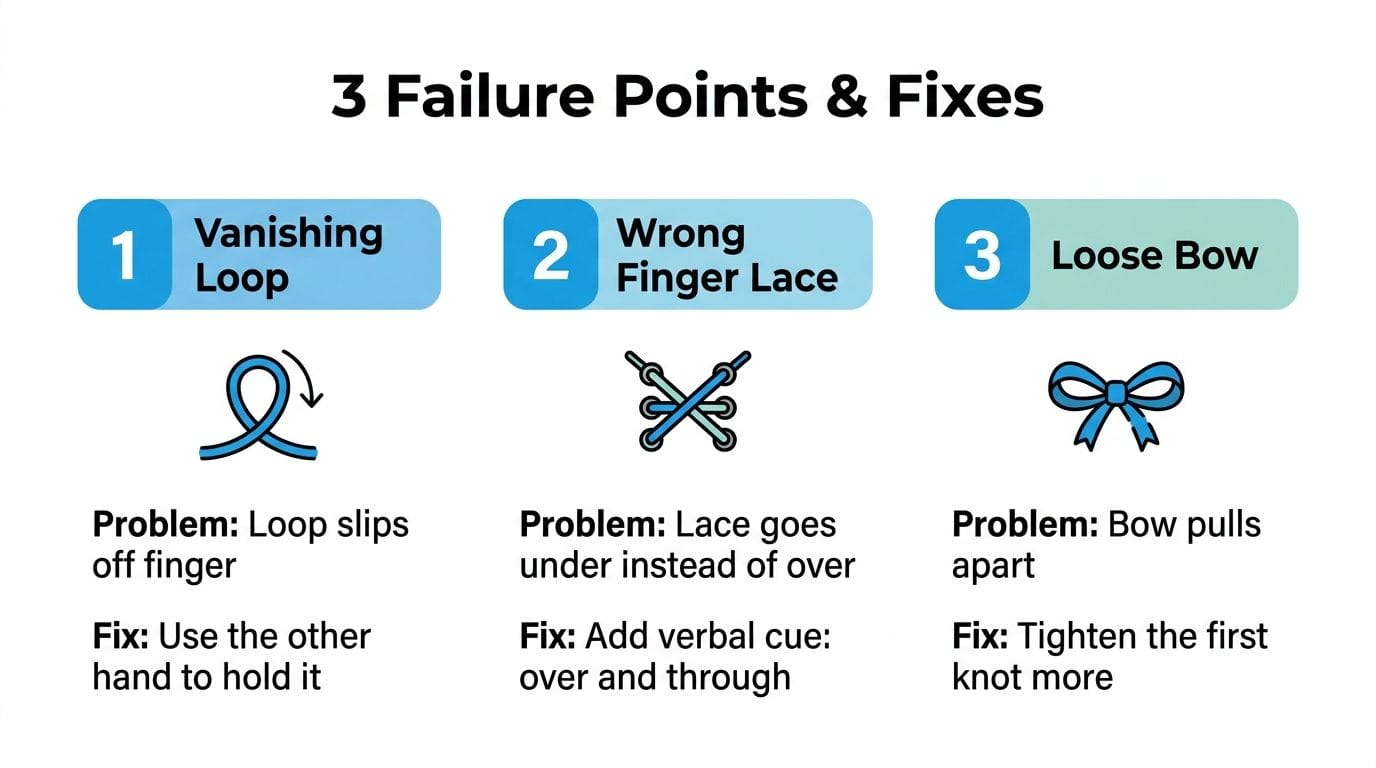
The same three breakdowns show up again and again on the floor. The loop vanishes, the lace goes under the wrong finger, or the bow looks finished but falls apart the second the child stands up. Those aren't random glitches. They point to a specific skill gap, and each one needs a different fix.
Vanishing loop and wrong-finger lace
When the loop slips off the finger, the problem is usually orientation and pinch endurance. The child may know how to make the loop, but not how to hold it long enough to complete the next move. A cheap fix that works better than repeated verbal coaching is to use contrasting lace colors or keep one hand physically responsible for stabilizing the loop while the other hand wraps.
If the lace goes under instead of over, the child likely needs more explicit hand naming and a clearer crossing cue. I've seen that step improve when the parent says “over and through” at the exact crossing moment and keeps the lace reset before every trial. Loose, messy setup makes errors more likely before the child even starts.
Loose bow
The bow that looks done but comes apart usually means the first knot wasn't snug enough or the final tightening step was too vague. Many guides separate “pull both loops evenly” into its own step for a reason. The child may think the job is finished, while the knot is still unstable.
The fix is simple, but it has to be taught on purpose. Make tightening a distinct action, not a casual afterthought. If the child can form the loops but can't secure the final pull, don't keep drilling the whole chain. Teach the tightening step until it's clean, then reconnect it to the rest of the sequence.
I've watched this turn around in session when the team stopped chasing the whole bow and instead logged each failure point separately. Once the parent could see whether the miss was orientation, crossing, or tightening, the teaching got calmer and the child got fewer mixed signals.
Bringing It All Together Into a Plan You Can Actually Run
The common mistake is assuming shoe tying should be taught as one long routine from day one. That's usually where frustration starts, because the adult is teaching the whole chain while the child is still missing a prerequisite piece. A better plan is more boring and more effective.
Start small, then widen the chain
Begin with a quick prerequisite screen, bilateral coordination, pinch strength, visual-motor control, and sequencing. Then choose a chaining method that fits your child's profile instead of the method that feels most familiar to you. After that, teach the 10-step task analysis one observable behavior at a time and log the result after each practice.
The big three failure points deserve separate attention, not one catch-all fix. If the loop keeps disappearing, stabilize the loop. If the lace keeps going the wrong direction, tighten the crossing cue. If the bow won't hold, teach the final tightening as its own step.
Generalize after the first win
Don't expect instant transfer to every shoe in the house. A child who can tie one familiar pair on the kitchen floor may still struggle with a different lace texture, a different room, or a different caregiver's prompting style. That doesn't mean the skill is fake. It means the child has mastered the first context and still needs generalization practice.
The easiest place to start is with one shoe, one setup, and one consistent data method. When that starts to hold, add variation slowly. A good task analysis for tying a shoe isn't just a teaching aid, it's a map for the next step and the step after that.
If you want one place to keep shoe-tying notes, prompt levels, progress photos, and other daily care records together, Guiding Growth gives families a simple way to track the chain without losing the details. It's a practical fit for parents who want less guesswork and more visible progress.